David Chen thought he'd found the perfect deal on Facebook Marketplace last summer. If you're wondering how to find a good mini split installer, his story shows exactly what can go wrong.
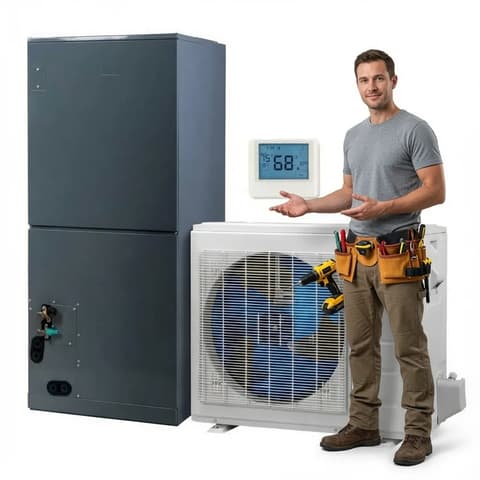
How to find a quality installer: (1) Verify state HVAC license and EPA 608 certification. (2) Confirm liability insurance and workers' comp. (3) Check online reviews (Google, Yelp, BBB). (4) Get 3+ written quotes. (5) Ask for references from recent jobs. Red flags: cash-only payment, no license number, price 30%+ below others, pressure tactics. Average professional installation: $1,500-$2,500. Consider DIY with pre-charged systems to save $1,500-$3,000.
He'd already spent $3,200 on a Mitsubishi Hyper-Heat system for his Portland garage workshop—top-of-the-line equipment that should have delivered 15-20 years of reliable service. When "Mike's HVAC" messaged offering installation for just $750 ("cash only, save on taxes"), David's excitement about saving $1,000+ off the typical $1,800 professional installation quote overcame his better judgment.
The installation took Mike and his helper four hours on a Saturday afternoon. They left with David's $750 cash, a business card with only a phone number, and a mini-split that technically cooled and heated. David noticed the outdoor unit wobbled slightly on its pad, and the refrigerant lines looked hastily secured to his garage wall, but the system ran and the remote worked. He convinced himself he'd made a smart financial decision—until three months later when his electric bills told a different story.
His garage workshop, which should have cost $40-50 monthly to condition, was driving electric bills up by $95-120 each month. The unit ran constantly but never quite reached the set temperature, cycling on and off every ten minutes with jarring compressor starts. When frost started building up on the outdoor unit during Portland's mild October weather—a temperature where properly installed systems should operate flawlessly—David finally called a licensed HVAC company for a diagnostic.
The certified technician's report devastated him: refrigerant charge 35% low from leaking flare connections, indoor unit mounted with just four screws into drywall (already pulling loose), condensate drain improperly pitched causing water backup, and electrical connections that violated code with undersized wire. "Your compressor is working three times harder than it should," the technician explained. "This installation probably shortened your system's lifespan to 6-8 years instead of 15-20. The manufacturer warranty is void because it wasn't installed by a licensed contractor, and fixing these issues properly will cost $1,800-2,200—basically the cost of proper installation from the start."
David's "savings" of $1,050 cost him an estimated $1,500 in excess electricity over just three months, $2,000 to repair the installation, void warranty coverage worth $2,000+, and reduced system lifespan representing another $3,000+ in lost value. His total loss exceeded $7,500 because he couldn't verify three simple things: a contractor license, liability insurance, and customer references.
This comprehensive guide provides the complete vetting process David wishes he'd followed—everything you need to find, evaluate, and hire the right professional HVAC contractor for mini-split installation. The time you invest in choosing the right contractor will save you thousands in avoided repairs, reduced energy waste, and full warranty protection.
Why Contractor Choice Matters
Poor Installation Consequences:
Immediate Issues:
- Refrigerant leaks from bad connections
- Electrical problems and safety hazards
- Water leaks from improper drainage
- Void manufacturer warranty
Long-Term Problems:
- 20-30% efficiency loss from improper charge
- Premature compressor failure
- Higher electric bills indefinitely
- Shortened system lifespan
Real Example:
Customer had $3,500 Mitsubishi system installed by "handyman" for $800 labor:
- Unit froze constantly
- Electric bill 40% higher than expected
- Compressor failed at 3 years (warranty denied)
- Cost to fix: $2,200
- Total loss: $5,700
Proper installation from the start would have cost $1,800 total.
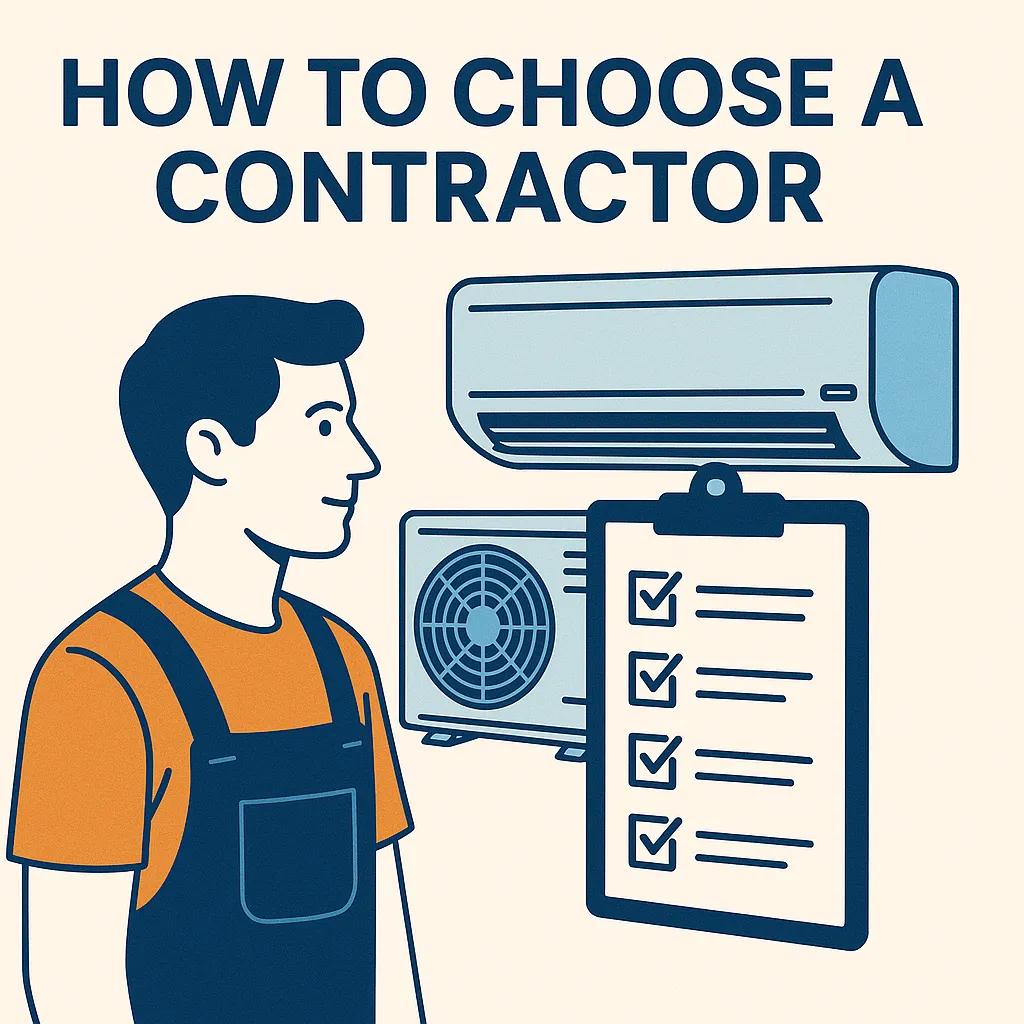
Licensed HVAC Contractor: What Certifications to Look For
Must-Have Credentials:
1. HVAC Contractor License
- State-issued
- Verify status online
- Should be current
- Covers liability
Check Your State:
- California: C-20 HVAC license
- Texas: TACL license
- Florida: CAC license
- New York: Varies by county
2. EPA 608 Certification
- Required for refrigerant handling
- Type II or Universal
- Federal requirement
- Ask to see card
3. Liability Insurance
- Minimum $1M coverage
- General liability
- Workers compensation
- Ask for certificate of insurance
4. Bonded
- Protects you if contractor doesn't finish
- Typical: $10,000-$50,000
- Verify with bonding company
5. Manufacturer Certifications
Many brands offer training:
- Mitsubishi Diamond Contractor
- Daikin Comfort Pro
- Fujitsu Elite Dealer
- Zone Air Certified Installer
Benefits:
- Advanced training
- Better warranty support
- Access to tech support
- Usually higher quality work
How to Verify:
- Ask for license number
- Check state licensing board website
- Request insurance certificate
- Call insurance company to verify active
- Check contractor with Better Business Bureau
Finding Quality Contractors
Best Sources:
1. Manufacturer Referrals
- Zone Air: Call (801) 882-2324 for certified installers
- Mitsubishi: Contractor locator on website
- Benefits: Pre-vetted, trained, accountable
2. Online Reviews
- Google Reviews (look for 4.5+ stars, 50+ reviews)
- Yelp
- Angie's List
- HomeAdvisor
Red Flags:
- All 5-star reviews (likely fake)
- No reviews at all
- Generic responses to negative reviews
3. Word of Mouth
- Friends/family with mini-splits
- Local HVAC supply houses
- Building inspectors
- Energy auditors
4. Professional Organizations
- ACCA (Air Conditioning Contractors of America)
- SMACNA (Sheet Metal and Air Conditioning Contractors)
- Local trade associations
Sources to Avoid:
- Craigslist
- Handymen without HVAC license
- "Guy in a truck" with no verifiable business
- Too-good-to-be-true prices on social media
Getting Quotes: What to Expect
Legitimate Quote Process:
1. On-Site Visit Required
Red Flag: Quotes over phone without seeing location
Contractor Should:
- Inspect installation location
- Measure the space
- Check electrical panel
- Evaluate wall construction
- Assess outdoor unit placement
- Take photos/notes
Time Required: 30-60 minutes
2. Detailed Written Quote
Must Include:
- Labor cost broken down
- All materials needed
- Electrical work if needed
- Timeline estimate
- Warranty information (labor and parts)
- Payment schedule
- Contractor license number
Red Flags:
- Handwritten napkin estimate
- Vague "all-inclusive" pricing
- Missing license number
- No warranty information
3. Number of Quotes to Get
Recommended: 3-4 quotes
Why:
- Compare pricing
- Gauge market rate
- Compare approaches
- Assess communication
Too Many Quotes:
- Time-consuming
- Overwhelming
- Good contractors book up fast
4. Price Ranges (Labor Only)
Single-Zone Installation:
- Budget: $800-$1,200
- Mid-range: $1,200-$1,800
- Premium: $1,800-$2,500
Multi-Zone (2-3 heads):
- Budget: $1,500-$2,500
- Mid-range: $2,500-$3,500
- Premium: $3,500-$5,000
Factors Affecting Price:
- Regional cost of living
- Difficulty of installation
- Electrical work needed
- Height of installation
- Wall construction (brick vs wood)
Questions to Ask a Mini Split Installer
Before Hiring:
Experience & Expertise:
-
"How many mini-splits do you install per year?"
- Good answer: 50+ annually
- Red flag: "First one" or "Just getting into these"
-
"Do you have experience with this brand?"
- Important for warranty and troubleshooting
- Brand-specific quirks exist
-
"Can you provide references from recent mini-split jobs?"
- Ask for 3-5 references
- Actually call them
-
"How long have you been in HVAC?"
- Prefer 5+ years experience
- New isn't bad if properly trained
Installation Process:
-
"What's your installation process?"
- Should describe: line set routing, electrical, vacuum/leak test, startup
-
"How do you size the system?"
- Should mention Manual J or heat load calculation
- Red flag: "That size should work" without calculation
-
"Do you handle the electrical work?"
- Licensed electrician required for some work
- May be separate trade
-
"How long will installation take?"
- Single zone: 4-8 hours
- Multi-zone: 1-2 days
- Be suspicious of "30-minute install"
Warranty & Service:
-
"What warranty do you provide on labor?"
- Good: 1-2 years minimum
- Better: 3-5 years
- Red flag: No labor warranty
-
"How do you handle warranty issues?"
- Should describe clear process
- Response time commitments
- Parts availability
-
"Do you service what you install?"
- Prefer "yes" for accountability
- Ask about service contracts
Specifics:
-
"Will you pull permits?"
- Required in most jurisdictions
- Protects you legally
- Ensures inspection
-
"How will you route the line set?"
- Discuss aesthetic concerns
- Hiding lines properly
- Protecting from weather
-
"What electrical upgrades are needed?"
- May need circuit breaker
- Dedicated circuit
- Possible panel upgrade
-
"When can you start?"
- Good contractors booked 2-4 weeks out
- Too available might be red flag
- Off-season (spring/fall) more availability
Red Flags to Avoid
Immediate Disqualifiers:
1. No License or Insurance
- Illegal in most states
- No recourse if something goes wrong
- Warranty likely void
2. Pressure to Decide Immediately
- "This price only good today"
- High-pressure sales tactics
- Won't give time to think
3. Cash-Only Payment
- Avoiding taxes
- No paper trail
- Hard to pursue legally
4. Full Payment Upfront
- Standard: 25-50% deposit, rest upon completion
- Red flag: 100% before work starts
5. No Physical Business Address
- PO Box only
- Can't verify legitimacy
- No accountability
6. Extremely Low Quote
- 30%+ below others
- Likely cutting corners
- May use subpar materials
- Might not finish job
7. No Written Contract
- Always get everything in writing
- Verbal agreements worthless in disputes
8. Negative Online Presence
- Multiple complaints about same issues
- BBB rating below B
- Responses that blame customers
Warning Signs:
During Initial Contact:
- Unprofessional communication
- Doesn't return calls/emails
- Shows up late without notice
- Disorganized or sloppy
During Quote:
- Doesn't ask questions
- Rushes through site visit
- Recommends wrong size system
- Can't explain the process
- Speaks poorly of competitors
- Pushes unnecessary upgrades
Contract Essentials
Your Contract Must Include:
1. Scope of Work
- Exact work to be performed
- Materials to be used (brand, model)
- Labor included
- Exclusions clearly stated
2. Timeline
- Start date
- Estimated completion
- What happens if delayed
3. Total Cost Breakdown
- Labor: $X
- Materials: $X
- Permits: $X
- Other fees: $X
- Total: $X
4. Payment Schedule
Typical:
- 25% deposit to schedule
- 25% upon delivery of equipment
- 50% upon satisfactory completion
Never:
- 100% upfront
- Cash payments with no receipt
5. Warranties
- Labor warranty: Duration and coverage
- Parts warranty: Manufacturer terms
- Who handles warranty claims
6. Permits & Inspections
- Contractor responsible for obtaining
- Included in price
- Schedule for inspections
7. Cleanup & Disposal
- Site cleanup expected
- Disposal of old equipment
- Debris removal
8. Insurance & Licensing
- Contractor license #
- Insurance certificate attached
- Bonding information
9. Change Order Process
- How to handle unexpected issues
- Approval required before extra work
- Pricing for changes
10. Termination Clause
- Conditions for cancellation
- Refund policy
- Kill fee if applicable
Day of Installation
What to Expect:
Preparation:
- Clear work area
- Provide access to electrical panel
- Move valuables from area
- Pets secured
- Someone home to answer questions
Professional Crew Will:
- Arrive on time (or call if delayed)
- Introduce themselves
- Lay drop cloths
- Explain work plan
- Ask questions as needed
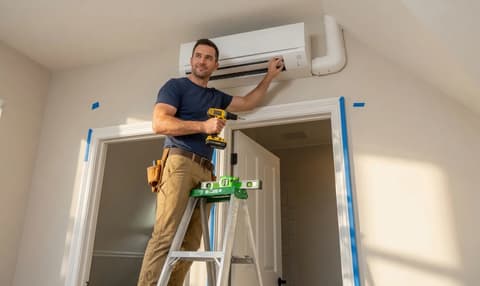
Installation Steps to Watch:
-
Outdoor unit placement
- Level and secure pad
- Proper clearances
- Vibration isolation
-
Indoor unit mounting
- Level installation
- Studs or blocking used
- Proper height
-
Line set running
- Neat appearance
- Protected from elements
- Insulated properly
-
Electrical connection
- Dedicated circuit
- Proper gauge wire
- Secure connections
- Proper grounding
-
Vacuum and pressure test
- Should vacuum 30+ minutes
- Leak test before releasing refrigerant
- Proper gauges used
-
Startup and testing
- Both cooling and heating modes
- Check temperature drop/rise
- Verify all functions
- Program remote
-
Walkthrough with you
- Explain operation
- Demonstrate remote
- Answer questions
- Provide documentation
Red Flags During Install:
- Skipping vacuum pump step
- Rushing through testing
- No leak check
- Sloppy refrigerant lines
- Obvious ductwork or drywall damage
- Unwilling to answer questions
Post-Installation
Before Contractor Leaves:
1. Test Everything
- Cool mode
- Heat mode
- All fan speeds
- Swing/vane operation
- Timer functions
- Remote control
2. Get Documentation
- Warranty cards filled out
- Owner's manual
- Refrigerant charge specs
- Filter cleaning instructions
- Contractor contact info
3. Final Payment
- Only after testing
- Only after cleanup
- Get receipt
- Verify warranty registration
4. Ask Questions
- Maintenance schedule
- Filter cleaning
- What's normal vs concerning
- When to call for service
Follow-Up:
Within 24 Hours:
- Leave online review (if satisfied)
- File warranty paperwork
- Save all documents
Within 1 Week:
- Monitor performance
- Note any issues
- Contact contractor if problems
Within 1 Month:
- Follow up on any callbacks
- Ensure system performing well
- Schedule first maintenance if needed
Complaint Resolution
If Something Goes Wrong:
1. Document Everything
- Photos of issues
- Written descriptions
- Dates and times
- Communication records
2. Contact Contractor
- Give chance to fix
- Be specific about problem
- Set deadline for resolution
3. Escalate if Needed
- State licensing board
- Better Business Bureau
- Manufacturer (warranty issues)
- Small claims court (last resort)
Leverage:
- Online reviews (mention you'll update)
- Licensing board complaints
- Withhold final payment (if justified)
DIY vs Professional Installation
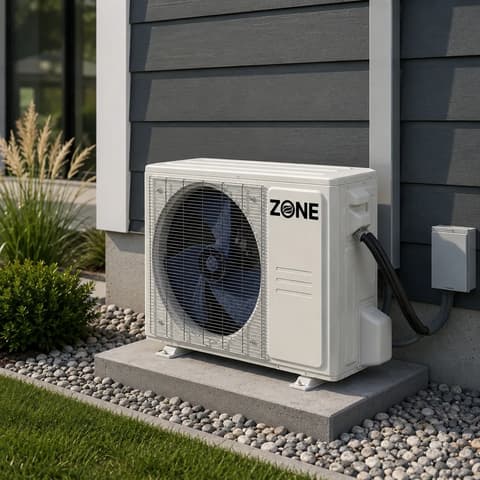
Zone Air Systems: DIY-Friendly
Zone Air mini-splits designed for DIY:
- Pre-charged line sets
- No vacuum pump needed
- Detailed instructions
- Video guides available
- Live tech support (9–5 MST)
DIY Savings: $1,500-$3,000
When to DIY:
- Comfortable with tools
- Can do electrical work (or hire electrician)
- Have time to do it right
- Want to save money
When to Hire Pro:
- Not comfortable with electrical
- No time for project
- Want warranty on labor
- Complex installation (high walls, difficult routing)
Bottom Line
Hiring Checklist:
✓ State contractor license ✓ EPA 608 certification ✓ Liability insurance ✓ Good online reviews ✓ Manufacturer training ✓ 3-4 written quotes ✓ Detailed contract ✓ References checked ✓ Clear warranty terms ✓ Comfortable with contractor
Time Investment:
- Research: 2-3 hours
- Quotes: 3-4 hours
- Installation day: 4-8 hours
- Total: 10-15 hours
Cost Range:
- Bottom tier: $800-$1,500
- Quality professional: $1,500-$2,500
- Premium service: $2,500-$4,000
Value: Proper installation ensures:
- Full system efficiency
- Manufacturer warranty valid
- 15-20 year lifespan
- Optimal comfort
- Lower energy bills
ROI of quality installation: Priceless
Frequently Asked Questions
How do I find a qualified mini-split installer near me?
Start with manufacturer referrals—brands like Zone Air, Mitsubishi, and Daikin maintain databases of certified installers who've completed training programs and meet specific standards. These pre-vetted contractors have demonstrated technical competence and are accountable to the manufacturer for warranty support. Beyond manufacturer networks, check Google Reviews for contractors with 4.5+ star ratings and 50+ reviews (not all perfect 5-stars, which often indicate fake reviews), consult local HVAC supply houses who know which contractors consistently do quality work, and ask friends or neighbors with existing mini-splits about their installation experience. Professional organizations like ACCA (Air Conditioning Contractors of America) and SMACNA maintain member directories of established contractors. Avoid Craigslist, handymen without HVAC licenses, and social media deals that seem too good to be true—proper mini-split installation requires specialized training that unlicensed installers simply don't possess.
What licenses and certifications should my HVAC contractor have?
Your contractor must hold a current state HVAC contractor license (verify status online through your state licensing board), EPA 608 certification (Type II or Universal) required by federal law for refrigerant handling, general liability insurance with minimum $1 million coverage, workers compensation insurance, and bonding typically $10,000-50,000 to protect you if they don't finish the job. Ask to see the actual EPA certification card and request a certificate of insurance, then verify it's active by calling the insurance company directly. Beyond these legal requirements, manufacturer-specific certifications (Mitsubishi Diamond Contractor, Daikin Comfort Pro, Zone Air Certified Installer, etc.) indicate advanced training and access to technical support. NATE (North American Technician Excellence) certification demonstrates technical competence through rigorous testing. Never hire an installer who can't immediately provide license numbers and insurance documentation—if they hesitate or make excuses, walk away regardless of their price.
How much should professional mini-split installation cost?
Legitimate single-zone installations typically cost $800-2,500 for labor depending on your region, installation complexity, and contractor experience. Budget installations ($800-1,200) often come from newer contractors or those with less mini-split experience. Mid-range professional installations ($1,200-1,800) represent the market average for experienced contractors with proper credentials. Premium installations ($1,800-2,500+) typically include manufacturer-certified contractors, challenging installations (high walls, difficult routing), or regions with high labor costs. Multi-zone systems with 2-3 indoor units cost $1,500-5,000 for labor. If you receive quotes 30% or more below these ranges, it's a red flag—extremely low prices usually mean the contractor is unlicensed, will cut corners on materials, rushes through critical steps like vacuum testing, or won't finish the job. Remember that poor installation can cost you $1,500+ in wasted energy over just the first year, void your manufacturer warranty worth $2,000+, and dramatically shorten your system's lifespan. Paying an extra $500-800 for a quality contractor represents the smartest money you'll spend on your mini-split investment.
How long does professional mini-split installation take?
A proper single-zone installation requires 4-8 hours for one to two technicians, including mounting both units, running refrigerant lines, making electrical connections, vacuum testing for 30+ minutes, leak testing, refrigerant charge verification, and thorough system testing in both heating and cooling modes. Multi-zone systems with 2-3 indoor units typically take 1-2 full days. Be extremely suspicious of any contractor claiming they can complete installation in 2-3 hours or offering "30-minute install" promotions—critical steps like proper vacuum testing, leak checking, and system balancing simply cannot be rushed without compromising long-term performance and reliability. Contractors who rush installations are likely skipping the vacuum pump step (the #1 cause of premature compressor failure), not properly testing for refrigerant leaks, making sloppy electrical connections, or inadequately securing the refrigerant lines. A professional who allocates proper time for your installation is protecting your investment and ensuring the full 15-20 year lifespan your system is designed to deliver.
What questions should I ask a mini-split contractor before hiring them?
Ask "How many mini-splits do you install per year?" (look for 50+ annually for experienced contractors), "Can you provide 3-5 references from recent mini-split installations?" (actually call them), "What's your installation process?" (should describe line set routing, electrical work, vacuum testing, leak testing, and startup procedures), "How do you size the system?" (should mention Manual J heat load calculations, not just square footage guesses), "What warranty do you provide on labor?" (look for minimum 1-2 years, preferably 3-5 years), "Will you pull permits?" (required in most jurisdictions and ensures inspection), and "How will you route the line set?" (discuss aesthetic concerns and hiding options). Ask to see their contractor license, EPA 608 certification, and certificate of insurance, then verify these are current. Get detailed written quotes from 3-4 contractors that break down labor costs, materials needed, electrical work, timeline estimates, warranty information, payment schedule, and contractor license number. Any contractor who pressures you to decide immediately, won't provide time to check references, offers cash-only payment, demands full payment upfront, or can't provide documentation should be immediately disqualified.
Do I need a contractor to install a mini-split or can I DIY?
It depends on your comfort level with tools, electrical work, and the system you choose. Traditional mini-splits require EPA 608 certification for refrigerant handling, professional vacuum pumps, manifold gauges, and specialized training—making professional installation essentially mandatory and DIY installation technically illegal without proper certification. However, modern pre-charged line set systems like Zone Air mini-splits are specifically engineered for DIY installation, eliminating the need for vacuum pumps or refrigerant handling. DIY installation saves $1,500-3,000 in labor costs and is completely legal for pre-charged systems. Choose DIY if you're comfortable with basic electrical work (or can hire an electrician separately for $200-400), have time to follow detailed instructions carefully, can work at heights safely for wall-mounting, and want to save money. Choose professional installation if you're not comfortable with electrical connections, don't have time for a weekend project, want warranty coverage on labor, or face a complex installation with difficult line set routing or high wall mounting. Zone Air DIY Series systems include comprehensive video guides and live tech support (9–5 MST) specifically to make DIY installation accessible to homeowners who've never touched HVAC equipment before.
What red flags indicate I should avoid a contractor?
Immediately walk away from any contractor who lacks a valid state HVAC license or refuses to provide their license number for verification, doesn't carry liability insurance and workers compensation, demands cash-only payment to "avoid taxes," requires 100% payment upfront before starting work, pressures you to decide immediately with "this price only good today" tactics, has no physical business address (only PO box), or quotes 30%+ below all other estimates without clear explanation. Warning signs that deserve scrutiny include all perfect 5-star reviews with no negative feedback (likely fake), zero online presence or reviews, multiple BBB complaints about the same issues (unfinished work, poor quality, won't return for warranty issues), arrives late to appointments without notice or communication, rushes through the site visit without asking questions or taking measurements, can't explain their installation process clearly, speaks poorly of all competitors, or recommends system sizes without performing load calculations. During installation, red flags include skipping the vacuum pump step, refusing to allow you to watch or ask questions, rushing through system testing, not testing both heating and cooling modes, leaving a messy work site, or unwillingness to provide documentation and warranty information before accepting final payment.
Need help finding a Zone Air-certified installer in your area? Contact us at (801) 882-2324 or check our contractor network.
Considering DIY? Check our installation guide and see if it's right for you.