Kevin's DIY mini-split install was perfect—until he under-tightened the line set connections. Cost: $385 for refrigerant replacement and proper torquing.
The mistake: He hand-tightened until it stopped, missing the critical 1/4 turn that creates the seal. "Hand-tight plus 1/4 turn" means hand-tight until FIRST resistance, THEN add 1/4 turn with a wrench.
Result: 60-70% refrigerant loss overnight through loose fittings.
This guide shows you exactly how to route, connect, and test line sets correctly the first time—avoiding Kevin's $385 mistake.
Line Set Basics
Two copper tubes:
- Liquid line (small, 1/4"-3/8"): High-pressure liquid refrigerant at 400 PSI
- Suction line (large, 1/2"-5/8"): Low-pressure gas at 100 PSI (pre-insulated to prevent condensation)
Bundled with: Copper tubing, insulation, 4-conductor signal wire, drain tubing
Pre-charged vs. Standard:
| Type | Requirements | Cost | DIY-Friendly? | |------|-------------|------|---------------| | Standard | Vacuum pump, EPA cert, gauges, skills | +$500-$1,200 tools | ❌ No | | Pre-charged | Basic wrenches (included) | +$50-$150 premium | ✅ Yes |
Pre-charged = DIY-friendly. No vacuum pump, no EPA cert, no refrigerant handling. Just route, connect, open valves.

Tools You Need
Essential (most homeowners have):
- Tape measure, level, drill, 3-4" hole saw
- Screwdrivers, adjustable wrenches (included w/ Zone)
- Wire strippers, utility knife, safety glasses
- Cost: $100-$200 (if buying all)
Standard line sets require:
- Vacuum pump ($300-$600)
- Manifold gauges ($150-$400)
- Torque wrench ($80-$200)
- Flaring tool ($100-$300)
- Total: $500-$1,200 ❌
Pre-charged line sets require:
- Just the essential tools above ✅
- Wrenches included with Zone systems
Consumables: Electrical tape, caulk, zip ties, brackets ($50-$100)
Savings: Pre-charged costs $50-$150 more but saves $500-$1,200 in tools + $1,500-$3,000 in labor = $1,500-$3,000 net savings
Choosing Line Set Length
Standard lengths: 15, 25, 35, 50 feet
How to measure:
- Measure straight-line distance
- Add vertical runs
- Add for actual routing (walls, eaves)
- Add 10-15% buffer
- Choose next size up
Example: 16 ft straight-line → 18-20 ft actual → Buy 25 ft line set
⚠️ Can't extend pre-charged lines (releases refrigerant)
Length limits by system size:
| BTU | Min Length | Max Length | |-----|-----------|-----------| | 9K | 12 ft | 25 ft | | 12K | 12 ft | 33 ft | | 18K | 12 ft | 50 ft | | 24K+ | 12 ft | 82 ft |
Why it matters:
- Too short: Oil circulation problems, compressor damage
- Too long: 1-2% efficiency loss per 25 ft, reduced capacity
- Under 12 ft: Coil excess horizontally (never vertically—traps oil)
Elevation: Max 33-50 ft vertical. Indoor higher = easier (oil returns downward naturally).
Route Planning
4 priorities:
- Shortest route: Less distance = better efficiency (1-2% loss per 25 ft)
- Protected: Inside walls best. Outside = use UV-resistant covers, avoid high-traffic areas
- Aesthetic: Behind architectural features, use line set covers, consider curb appeal
- Accessible: Future service needs access—avoid permanent obstructions
Wall penetration:
- Align with unit connections (avoid sharp bends)
- Between studs (use stud finder)
- Avoid wiring/plumbing (use wall scanner)
- 5-10° downward slope (1/4" per foot—critical for drainage!)
- Position 6-8" below unit
Typical heights:
- Indoor unit: 7-8 ft high
- Wall penetration: 6-8" below unit connections
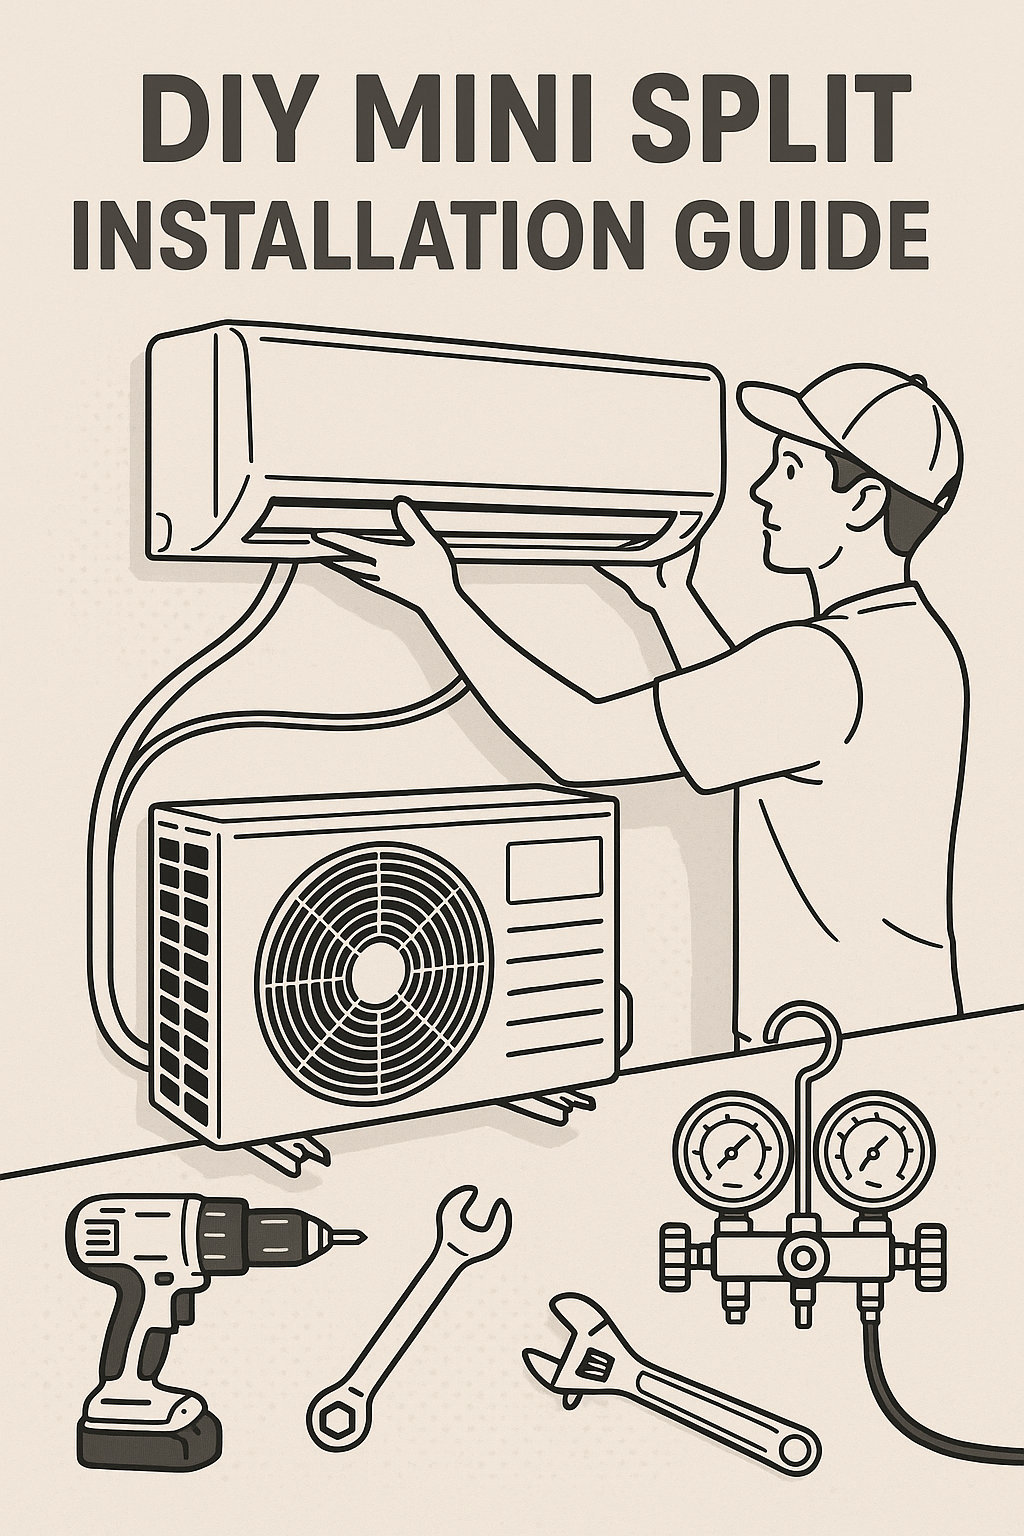
Installation Steps (Pre-Charged)
Phase 1: Wall Penetration
- Mark location, check for wiring/plumbing (stud finder, wall scanner)
- Drill 1/4" pilot hole, verify clearance outside
- Drill 3" hole at 5-10° downward slope (critical for drainage!)
- Install wall sleeve if provided
Phase 2: Run Line Set
- Choose unit exit direction (left/right/back)
- Unpackage carefully—no kinks! (Use 6" min bend radius)
- Bundle: 2 copper lines + signal wire + drain (keep signal wire 6" from 230V power!)
- Feed through wall (6-12" slack inside)
- Route to outdoor unit: shortest path, support every 3-4 feet
- Coil excess horizontally only (never vertical—traps oil!)
- Maintain 12-24" clearances around outdoor unit
Phase 3: Connect Line Sets (⚠️ Critical—Kevin's $385 mistake!)
- Remove caps, inspect/clean flare surfaces
- Hand-tighten until FIRST resistance (not max tight!)
- Use 2 wrenches: One holds valve, one turns nut
- Add exactly 1/4-1/3 turn past hand-tight
- Stop at firm resistance—don't force!
Torque values:
- 1/4": 14-18 ft-lbs
- 3/8": 35-42 ft-lbs
- 1/2": 50-55 ft-lbs
- 5/8": 60-65 ft-lbs
- Repeat for all 4 connections (2 indoor, 2 outdoor)
Phase 4: Release Refrigerant (⚠️ Point of no return!)
- Verify ALL connections tight
- Open liquid valve first (4mm hex, 2-3 turns counter-clockwise)
- Wait 1 minute (pressure equalization—critical!)
- Open suction valve (3-4 turns)
- Replace caps on both valves
- Test: Cold air within 3-5 min, condensation on suction line
Phase 5: Electrical
- Connect 4-conductor signal wire to both units (match colors/numbers exactly)
- Tighten terminals, tug-test each wire
- Keep signal wire 6"+ from 230V power
Phase 6: Finish
- Seal wall penetrations (silicone caulk)
- Secure lines every 3-4 feet
- Add line set covers (optional, improves appearance)
- Test all modes 30 min each
Why Pre-Charged Wins Over Standard Line Sets
Standard line sets require 5 additional complex steps:
- Create perfect flares (requires practice, flaring tool)
- Make connections with field flares (less reliable than factory)
- Nitrogen pressure test at 300 PSI (never use air—moisture ruins compressors)
- Deep vacuum to 500 microns (30-60 min, requires micron gauge)
- Charge refrigerant precisely (requires scales, gauges, EPA cert, experience)
Pre-charged eliminates ALL of this:
- ✅ No specialized HVAC tools
- ✅ No EPA 608 certification
- ✅ Zero risk of improper charge
- ✅ Warranty-friendly
- ✅ Saves 4-8 hours + $500-$1,200 in equipment
$50-$150 premium = extraordinary value
Routing Best Practices
Indoor: In-wall (best, new construction), decorative channels ($20-50), or behind furniture
Outdoor protection:
- UV: Line set covers ($15-60/10 ft) or UV-resistant paint
- Physical: Raise 6"+ above ground, use PVC conduit in high-traffic areas
- Weather: Silicone caulk penetrations, slope toward outdoor unit, stainless fasteners
Support: Every 3-4 ft horizontal, every 6 ft vertical. No sagging, no compressed insulation.
Indoor routing offers three distinct concealment strategies, each suited to different situations and budgets. In-wall routing provides perfect aesthetics by running line sets through wall cavities before drywall installation, creating completely hidden infrastructure that looks factory-installed—this method works beautifully for new construction or major renovations where walls are already open, though it requires careful planning since you can't easily reroute lines after walls are closed. Decorative channels offer the second-best appearance using PVC or metal covers painted to match wall color, creating clean lines that blend into your décor while remaining accessible for future service—these covers cost $20-50 per run, install easily with self-tapping screws, and work perfectly for existing homes where in-wall routing isn't feasible. Behind-furniture routing provides free concealment by positioning refrigerant lines where bookcases, entertainment centers, or other permanent furniture hides them from view—this works great as long as you don't plan to rearrange that room, though it limits your future decorating flexibility.
When lines must remain visible despite your best concealment efforts, proper exposed routing minimizes visual impact dramatically. Use proper line set covers painted to match your walls rather than leaving raw insulation exposed—the visual difference is night and day, transforming industrial-looking pipes into architectural features that blend naturally. Route along corners where walls meet rather than across flat wall surfaces where lines become focal points attracting attention. Use existing architectural features like crown molding, baseboards, or door trim to hide lines in shadows and visual breaks where eyes naturally skip over details. These exposed routing techniques turn necessary compromises into acceptable solutions that maintain your home's appearance.
Outdoor routing demands three critical protection categories that determine whether your line set lasts 15+ years or fails within 3-5 years from environmental damage. UV exposure protection matters enormously because standard foam insulation degrades rapidly in direct sunlight—you'll notice brittleness, cracking, and eventual complete disintegration within just 1-2 years of unprotected sun exposure, leaving bare copper pipes that lose efficiency and accumulate condensation. UV-resistant line set covers solve this problem permanently using either PVC plastic channels ($15-40 per 10 feet) that are lightweight, paintable, and install easily with self-tapping screws, or metal channels ($30-60 per 10 feet) delivering superior durability, better appearance, higher cost, and availability in pre-painted finishes matching common home colors. If you can't install covers immediately, painting exposed insulation with UV-resistant exterior paint provides temporary protection requiring reapplication every 2-3 years—a maintenance-intensive workaround for budget-conscious installations. Never attempt running vinyl siding over refrigerant lines thinking it hides them beautifully—this creates unsightly bulges visible from across the street that scream "amateur installation" while potentially compressing insulation and restricting refrigerant flow.
Physical damage protection prevents the heartbreaking scenario where a single lawn mower contact severs refrigerant lines, requiring $600-$1,200 in professional repairs to recover refrigerant, repair lines, re-evacuate, and recharge the system. Raise lines at least 6 inches above ground level to clear typical grass trimming and light landscape work, avoiding the danger zone where equipment contacts become inevitable. Use rigid PVC conduit ($8-15 per 10 feet) for ground-level sections or high-traffic areas exposed to foot traffic, bicycles, lawn equipment, or vehicle movement—this investment prevents catastrophic damage costing 10-20 times more than the conduit itself. Secure lines firmly to wall surfaces every 3-4 feet to prevent movement from wind, vibration, or accidental contact that works connections loose over time. Consider protective guards near garage doors, gates, or other moving equipment where pinch points or impact zones create predictable hazards.
Weather and moisture protection prevents the insidious damage that develops slowly over years before surfacing as major failures. Seal all wall penetrations with exterior-grade silicone caulk rather than spray foam—silicone remains flexible through freeze-thaw cycles and doesn't compress refrigerant lines, while spray foam can squeeze lines and fails within 3-5 years from UV exposure. Slope line sets slightly downward toward the outdoor unit for drainage, preventing water accumulation in low spots that accelerates corrosion and freezes during winter creating pressure damage. Allow for thermal expansion and contraction since copper tubing expands notably with temperature changes—rigid mounting without expansion provision creates stress that works connections loose over years of seasonal cycling. Use stainless steel or UV-resistant plastic fasteners exclusively since regular steel screws and straps rust completely away within 3-5 years in wet climates, dropping your line sets onto the ground. Add drip loops (deliberate downward curves) before wall entry preventing water from tracking along lines straight into your home—physics makes water follow the curve downward and drip off rather than continuing horizontally through the penetration. Consider protective escutcheon plates (decorative rings) at wall penetrations for finished appearance that also shields penetrations from rain, insects, and debris infiltration.
Support requirements prevent the sagging, vibration, and noise that plague improperly secured installations while maintaining insulation integrity and professional appearance. Horizontal runs demand support every 3-4 feet maximum using proper line set hangers designed for refrigerant lines rather than improvised wire or strapping—proper hangers distribute pressure without compressing insulation while preventing sagging that looks sloppy and creates low spots where oil accumulates. Don't allow any sagging between supports since even slight drooping multiplies over long runs creating dramatic appearance problems and potential oil return issues. Maintain continuous insulation coverage without compression where supports contact lines—compressed insulation creates cold spots where condensation forms, leading to water dripping and efficiency loss.
Vertical runs require support every 6 feet minimum to prevent the sliding that occurs when line sets gradually work loose from mounting and settle downward under their own weight. Prevent this sliding by using secure mounting brackets at proper intervals, eliminating the slow creep that stresses connections and creates messy appearance. Don't compress insulation when securing vertical runs since the weight of long vertical sections tempts installers to overtighten straps for security—use wider straps or purpose-built vertical hangers that secure without crushing. Maintain straight, plumb appearance on vertical runs since crooked lines immediately telegraph amateur installation to anyone viewing your home—a 4-foot level and careful mounting creates professional appearance that maintains your home's value.
Common Mistakes to Avoid
Learning from others' expensive mistakes saves you time, money, and frustration—these ten common errors account for 80% of DIY line set installation problems, yet all remain completely preventable with proper technique and attention to detail.
Kinking copper tubing creates permanent damage that restricts refrigerant flow and reduces system efficiency by 20-40%, transforming your high-efficiency mini-split into an underperforming energy waster. Kinked copper cannot be straightened—once the metal deforms into a sharp bend, the internal diameter remains restricted even after attempting to reshape it. Prevent kinking by using bending springs ($10-20 to purchase, or free from some tool rental centers) that slip over copper tubing before bending, supporting the walls internally to maintain round cross-section during curves. Make only gentle, gradual curves with minimum 6-inch bend radius—visualize bending around a coffee can rather than a soda can. Support tubing with your hand on both sides of the bend point to distribute bending pressure, never forcing sharp V-bends that create instant kinks. If you do kink a line despite precautions, you must cut out the damaged section and add a flare coupling to rejoin the tubing—for pre-charged systems this often requires professional repair since the refrigerant charge makes cutting and rejoining more complex.
Overtightening flare connections crushes the soft copper seating surface, creating the exact leak you're trying to prevent through excessive force. This counterintuitive failure mode catches countless DIYers who assume "tighter equals better seal." Follow torque specifications precisely (typically 1/4 to 1/3 turn past hand-tight, as detailed earlier in the connection section), use proper flare-nut wrenches sized for your specific connections, employ mandatory two-wrench technique where one wrench holds the valve body stationary while the second turns the flare nut, and remember the magic formula: hand-tight (first resistance) plus exactly 1/4 turn using the wrench creates perfect seal. Overtightening doesn't just risk immediate leaks—it can crack the flare entirely or deform the brass valve seat, creating slow leaks that surface months later after you've completed installation and moved on.
Damaged insulation causes condensation dripping from refrigerant lines, efficiency losses from uninsulated copper transferring heat with surrounding air, and unsightly water stains on walls and ceilings below affected lines. Protect insulation carefully during installation by handling line sets gently and avoiding dragging across rough surfaces, repair any tears immediately using foam insulation tape ($8-12) that creates weatherproof seal, add supplemental insulation where original coverage seems thin or marginal, and install mandatory UV protection for any outdoor insulation exposure as detailed in the routing section. Many DIYers dismiss minor insulation damage as cosmetic—it's not. A 2-inch gap in insulation causes condensation that drips several ounces of water per day during humid weather, enough to stain ceilings, promote mold growth, and rot wood framing over time.
Wrong slope on wall penetrations invites water intrusion that damages interior walls and creates drainage problems allowing condensation to back up toward your indoor unit. Slope the penetration downward toward the exterior at 1/4 inch per foot minimum (roughly 1/4-inch drop across a 12-inch deep wall), creating positive drainage that prevents water from ever traveling inward. Test your slope before final sealing by pouring water through the penetration and verifying it flows outward freely without pooling or traveling inward. Seal properly with silicone caulk after confirming correct slope. Penetrations sloped even slightly inward become water entry points during heavy rain when wind drives water horizontally—a mistake that surfaces during the first major storm, creating emergency repair situations.
Opening service valves before completing all connections releases refrigerant into atmosphere, voids your warranty, potentially violates EPA regulations, and creates system failure requiring expensive professional recovery and recharging. Complete absolutely all flare connections first and double-check every single torque specification before touching service valves. Once you open those valves, the refrigerant floods through the entire system within seconds—you can't undo this action. This mistake proves particularly devastating with pre-charged systems since the carefully measured factory charge escapes, requiring complete professional service to recover, evacuate, and recharge (costing $400-$800 to fix a 30-second error).
Insufficient support creates sagging lines that look terrible, generate vibration noise as refrigerant pulses through unsupported spans, and can work connections loose over years of movement. Support every 3-4 feet for horizontal runs and every 6 feet for vertical runs using proper refrigerant line hangers ($1-3 each) rather than improvised wire or strapping. Check immediately after installation by stepping back and viewing from multiple angles—sagging is obvious when you look for it but easy to miss when focused on individual mounting points. Adjust any insufficiently supported sections before buttoning up the installation. Adding support after the fact proves far more difficult than doing it right initially, and sagging lines continually remind you of corner-cutting every time you see them.
Coiling excess line set vertically creates the oil-trapping low spots that starve your compressor of essential lubricating oil, causing catastrophic failure within 2-5 years instead of the expected 15-20 year lifespan—this single mistake can destroy a $1,200 compressor. Mini-split compressors depend on refrigerant flow to carry oil throughout the system and back to the compressor, but vertical loops trap oil in the bottom of each loop where it sits uselessly instead of returning. Never coil excess line set in vertical loops hanging on the wall. Always coil horizontally in flat coils like a garden hose on the ground near the outdoor unit, or better yet, lay excess in serpentine S-pattern that eliminates coils entirely while using the extra length. Ensure all routing slopes properly toward the compressor for positive oil return, and avoid any low spots or trap configurations anywhere in the routing path.
Running signal wires alongside power wires subjects your 24-volt communication lines to electromagnetic interference from 230-volt power lines, causing erratic operation including random shutdowns, failure to respond to remote commands, communication errors displayed on indoor units, and intermittent system failures that prove maddeningly difficult to diagnose. Keep signal wires (control wires, typically small-gauge multi-conductor cable) in separate conduit from power wires or run them at least 6 inches apart if both are exposed. Use shielded signal cable rated for outdoor and sunlight exposure rather than standard indoor thermostat wire. Never bundle 230V and 24V wires together with zip ties or through the same penetration. If wires absolutely must cross, cross at 90-degree angle to minimize interference rather than running parallel where interference accumulates over distance.
Inadequate insulation in wall runs causes condensation forming on cold copper refrigerant lines inside walls, leading to water damage, mold growth in wall cavities, structural rot of wood framing, and health hazards from hidden mold that develops for years before surfacing as visible problems. Maintain continuous insulation coverage through the entire wall cavity with no gaps where copper contacts framing or drywall. Use closed-cell foam insulation exclusively for wall runs since it doesn't absorb moisture that defeats its purpose—open-cell foam soaks up condensation like a sponge, becoming a wet mess that promotes rot. Seal any gaps in insulation using foam tape creating weatherproof continuous coverage. Consider vapor barrier wrap in humid climates where condensation risk is highest. This mistake often goes unnoticed for 3-5 years until mold odors or water stains finally surface, by which point significant hidden damage has occurred.
Poor aesthetics reduces your home's value and curb appeal while broadcasting amateur installation to neighbors, visitors, and future home buyers who immediately deduct the cost of professional re-installation from their purchase offers. Plan your route meticulously before drilling any holes (measure twice, drill once saves countless regrets), use pre-painted line set covers in PVC or metal matching your home's color scheme rather than leaving raw insulation exposed, route along existing architectural features like corners, trim, gutters, and downspouts where lines blend naturally into the building's visual vocabulary, and consider decorative covers that integrate with your home's design style rather than fighting against it. Professional appearance adds tangible value to DIY installation—a clean, well-planned line set routing can actually increase home value while a sloppy installation creates immediate buyer objections that tank your sale price by $2,000-$5,000 or more.
Troubleshooting Issues
Even perfect installations occasionally develop issues requiring diagnosis and correction—recognizing symptoms quickly and applying proper solutions prevents minor problems from escalating into expensive repairs or permanent damage.
Refrigerant leaks manifest through progressively worsening cooling or heating performance as refrigerant escapes and system charge drops below optimal levels, ice formation on the indoor unit's evaporator coil from improper refrigerant pressure creating excessive cold spots, audible hissing sounds at connection points where high-pressure refrigerant escapes through small openings, and oily residue appearing at flare connections since refrigerant carries compressor oil that deposits when refrigerant evaporates. Address suspected leaks immediately by checking all flare connections and retightening any that feel less than snug using proper two-wrench technique, listening carefully throughout the entire line set for characteristic hissing (often louder when system is running), performing soap bubble test by brushing soapy water on all connections and watching for bubbles forming from escaping gas, and calling for professional repair if leaks persist after retightening since refrigerant recovery, repair, evacuation, and recharge require EPA-certified technicians with specialized equipment. Never ignore refrigerant leaks hoping they'll self-resolve—they only worsen over time, and running systems with low refrigerant charge damages compressors through improper lubrication and temperature extremes.
Condensation on refrigerant lines appears as water dripping from line sets creating puddles or stains, wet or waterlogged insulation that feels damp or squishy to touch, and mold or mildew growth on or around insulation from persistent moisture. Resolve condensation issues by adding or repairing insulation wherever you observe bare copper or damaged foam exposing metal to ambient air, ensuring vapor barrier remains intact throughout the entire line length without tears or gaps, dehumidifying the space if excessive ambient humidity exceeds your insulation's capacity to prevent condensation (this helps but doesn't substitute for proper insulation), and understanding that minor condensation during extreme humidity is normal and not concerning—only persistent dripping or soaked insulation requires action. Condensation generally indicates insulation failure rather than system malfunction, making it one of the easier issues to resolve through added protection.
Vibration and noise problems present as rattling sounds from loose line sets vibrating against mounting surfaces or other building components, humming transmitted through walls when unsupported refrigerant lines carry compressor vibration into building structure, and generally annoying operational sounds that weren't present initially but developed over weeks or months. Eliminate vibration noise by adding support hangers at closer intervals (every 2-3 feet instead of 3-4 feet) where problematic sections exist, using vibration-isolating hangers with rubber cushioning that dampens transmission into building structure, securing any loose sections that have worked free from their mounting over time, and checking outdoor unit mounting to ensure the compressor itself sits on vibration isolators properly and hasn't shifted or settled unevenly. Vibration noise almost always stems from inadequate support allowing movement—adding proper hangers typically resolves issues completely within minutes.
Poor system performance shows up as inadequate cooling or heating that fails to maintain setpoint temperatures despite continuous operation, unexpectedly high energy bills compared to similar systems or manufacturer specifications, and excessively long runtime where the system runs constantly without cycling off even when outdoor conditions are moderate. Diagnose performance issues systematically by checking for kinked line sets restricting refrigerant flow (look for sharp bends or crushed sections), verifying service valves opened fully by turning counterclockwise until they stop (partially-closed valves severely limit refrigerant flow), checking that insulation remains intact along entire line length without gaps causing efficiency loss, and verifying you installed correct sizing for your space (undersized systems run constantly without achieving comfort). Poor performance from line set issues typically stems from installation errors that surface immediately rather than developing gradually—if performance was good initially but declined over time, look toward maintenance issues like dirty filters or refrigerant leaks rather than line set problems.
Code Compliance
Code compliance protects your safety, maintains your warranty coverage, and prevents costly corrections when selling your home or filing insurance claims—understanding these requirements before installation prevents expensive surprises during inspections or future transactions.
Electrical codes govern the power supply to your mini-split system, requiring proper wire gauge (14 AWG minimum for most systems, though larger units may require 12 AWG or 10 AWG per manufacturer specifications and local code), GFCI protection if required by location (typically outdoor outlets, bathrooms, kitchens, and other wet areas per NEC requirements), disconnect switch installed within sight of the outdoor unit allowing service technicians to safely de-energize equipment before maintenance, proper grounding of all electrical components preventing shock hazards and ensuring safe operation, and correct breaker size matching equipment specifications (typically 15-30 amps depending on system capacity). Most jurisdictions require licensed electricians for new circuit installation, though homeowner wiring may be permitted in some areas—verify local requirements before proceeding with electrical work.
Mechanical codes regulate refrigerant handling and system installation to protect environmental and safety interests, mandating proper refrigerant handling by EPA-certified technicians for standard line sets (pre-charged systems exempt homeowners from this requirement since no refrigerant is released during installation), correct materials using copper refrigerant tubing exclusively (aluminum and other materials prohibited for refrigerant service), adequate support requirements preventing sagging and vibration as detailed in routing sections above, and maintained clearances around equipment for proper airflow and service access per manufacturer specifications. Pre-charged line set systems like Zone's offerings dramatically simplify mechanical code compliance by eliminating refrigerant handling requirements that represent the most complex regulatory aspect of mini-split installation.
Building codes address structural integrity and fire safety during installation, typically requiring permits for HVAC installations (check your local building department since requirements vary dramatically by jurisdiction—some exempt mini-splits under certain BTU capacities while others require permits for all installations), inspections if permits are required (usually rough-in inspection before closing walls and final inspection after completion), proper structural penetrations that maintain building envelope integrity without compromising structural members (never cut through load-bearing headers or studs without proper reinforcement), and fire blocking at wall penetrations to prevent fire spread through wall cavities (required by most codes where penetrations exceed 2 inches in diameter). Permit requirements generate significant debate in the DIY community—while some homeowners skip permits to avoid fees and inspection delays, unpermitted work can void insurance coverage during claims, complicate home sales when buyers discover unpermitted improvements, and result in expensive retroactive permitting with fines when discovered during other work.
HOA and deed restrictions impose additional requirements beyond legal codes, commonly regulating line set routing to minimize visual impact from streets and neighboring properties, outdoor unit location restricting placement to approved areas that maintain community aesthetics, aesthetic requirements including line set covers, unit screening, or color matching to blend equipment with home exterior, and requiring approval before installation to avoid violation notices and mandatory removal of non-compliant installations. Review your HOA covenants carefully before purchasing equipment—some associations prohibit visible outdoor units entirely or restrict them to specific locations that may not work with your home's layout. Getting HOA approval before installation prevents the heartbreaking scenario of completing installation only to receive violation notices requiring expensive relocation or removal.
When to Call a Professional
Knowing your limits prevents expensive mistakes, safety hazards, and the frustration of abandoned half-finished projects—honest self-assessment of your skills, available time, and project complexity determines whether DIY installation makes sense for your specific situation.
DIY remains entirely appropriate for installations using pre-charged line sets where refrigerant handling is eliminated, simple routing scenarios involving short runs with minimal obstacles and straightforward paths, accessible locations on first floors or easily-reached second-story exterior walls, and single-story buildings where ladder work stays manageable and safe for typical homeowners. These favorable conditions combine to create the 95%+ success rate Zone customers experience with pre-charged systems—the technology removes the most technically demanding aspects while leaving straightforward mechanical work that capable homeowners handle confidently.
Consider hiring professionals when tackling standard line sets requiring vacuum pumps and refrigerant charging (unless you already own equipment and hold EPA certification from previous HVAC work), complex routing through multiple stories, finished basements, or circuitous paths around architectural obstacles, difficult locations including high exterior walls requiring tall ladder work or scaffolding, crawl space routing through tight areas with poor access, or any situation where you feel uncertainty about any installation step. Uncertainty signals potential mistakes—if you're questioning whether you can handle specific aspects, that doubt often proves accurate and hiring professionals prevents expensive errors costing more to fix than professional installation would have cost initially.
Definitely call professionals for refrigerant leak repair requiring recovery, diagnosis, repair, evacuation, and recharging (typically $400-$1,200 depending on leak location and severity), adding refrigerant to systems with low charge (illegal without EPA certification and requires specialized equipment), repressurizing systems after refrigerant loss, and any compressor issues including unusual noises, failure to start, or overheating. These repairs involve refrigerant handling legally restricted to certified technicians, diagnostic skills requiring years of experience, and specialized tools costing thousands of dollars. Attempting DIY repair of these issues risks environmental violations (EPA fines start at $10,000 for improper refrigerant release), personal injury from high-pressure refrigerant or electrical hazards, and catastrophic equipment damage from incorrect procedures.
The crossover point where professional installation makes financial sense occurs around $800-1,000 in your estimated DIY time value plus any tool purchases required. If you value your time at $30/hour and installation will take 8 hours (conservative for first-time installation), that's $240 in time. Add $100-200 in tools you don't already own, and you're at $340-440 invested. Professional installation at $1,500-$2,500 still saves $1,060-$2,160 by going DIY. But if you need to rent scaffolding ($200), buy specialized tools ($300), and estimate 15+ hours struggling with complex routing ($450 at $30/hour), suddenly you've invested $950 in a stressful weekend project versus paying $1,500 for professionals who complete the work in 4-6 hours with guaranteed results and labor warranty. Run these numbers honestly for your specific situation before committing to DIY installation.
The Bottom Line
Line set installation success depends on five critical factors that separate professional-looking DIY installations from amateur projects requiring expensive corrections. Using pre-charged line sets like Zone DIY Series systems delivers the easiest and most reliable approach by eliminating refrigerant handling, vacuum pump requirements, and EPA certification—this single decision accounts for the dramatic success rate difference between 95%+ for pre-charged systems versus 60-70% for standard line sets. Planning your route carefully before drilling any holes ensures the shortest protected path that maintains aesthetic appeal, avoiding the sloppy appearance and vulnerability that plague hastily-planned installations. Proper wall penetration technique with correct downward slope, thorough sealing, and weather protection prevents water intrusion that damages interior walls and creates long-term moisture problems. Correct connection torque using the two-wrench method and precise 1/4-turn specification creates leak-proof seals without crushing copper—this critical step determines whether your system operates flawlessly for 15+ years or develops refrigerant leaks within months. Adequate support every 3-4 feet with proper hangers maintains straight, neat appearance while preventing vibration noise and connection stress that develops into failures over years of operation.
Time requirements vary dramatically based on system type and installer experience. Pre-charged line sets install in just 2-4 hours for first-time DIYers following proper procedures, while standard line sets requiring vacuum pumps consume 6-10 hours even for experienced installers due to the additional complexity of evacuation, leak testing, and refrigerant charging. Your experience level matters significantly—second installations typically proceed 30-50% faster than first attempts as you've already solved the planning and technique challenges that consume time during initial installations.
DIY savings prove substantial and represent the primary motivation for most homeowners attempting self-installation. Professional installation costs $1,500-$3,000 depending on system size, routing complexity, and regional labor rates—this represents pure labor since the line sets themselves cost only $100-$300. Pre-charged line sets carry a $50-$150 premium over standard line sets, but this premium proves irrelevant when comparing against professional installation costs. Your net DIY savings reach $1,350-$2,850 by installing pre-charged systems yourself—enough to upgrade to a higher-capacity system, add a second zone, or simply pocket the difference.
Success rates demonstrate why equipment choice matters as much as installer skill. Pre-charged systems achieve 95%+ DIY success rates because they eliminate the technical steps requiring specialized knowledge and equipment—refrigerant handling, vacuum pump operation, leak testing, and charging procedures that prove challenging even for experienced technicians. Standard line sets deliver only 60-70% DIY success since improper evacuation or charging creates problems that may not surface immediately but manifest as poor performance or premature failure within 1-5 years. Following this comprehensive guide dramatically improves your success probability across both system types by providing the detailed procedural knowledge that separates successful installations from problematic ones.
Zone DIY Series pre-charged line set advantage extends beyond simple DIY-friendliness into comprehensive system design optimized for homeowner installation. You need no special tools beyond basic hand tools most homeowners already own (drill, wrenches, level, tape measure), eliminating the $400-$1,000 investment in vacuum pumps, manifold gauges, and refrigerant handling equipment required for standard systems. EPA certification isn't required since you never release or handle refrigerant during installation—the factory-sealed system means homeowners can legally install their own systems without running afoul of environmental regulations. Refrigerant arrives pre-measured at exactly the correct charge for your specific line set length, eliminating the most common source of efficiency loss and premature failure in field-charged systems. The self-evacuating design purges air from line sets when you open service valves, removing the 30-45 minute vacuum pump step along with the expensive equipment and technical knowledge that step requires. Warranty coverage remains completely intact with proper DIY installation since Zone designs these systems specifically for homeowner installation rather than requiring professional service to maintain coverage. This combination creates perfect conditions for DIY success, explaining why Zone customers achieve industry-leading installation success rates.
Ready to install your own mini-split? Check out Zone's complete DIY systems with pre-charged line sets.
Need installation help? Call (801) 882-2324 for technical support during your install.
Video installation guides available on our YouTube channel.
Frequently Asked Questions
Can I install a mini-split line set myself without any HVAC experience?
Yes, if you use pre-charged line set systems like Zone mini-splits that are specifically designed for DIY installation. Traditional line sets require EPA 608 certification for refrigerant handling, professional vacuum pumps (costing $200-500), manifold gauge sets, and specialized training that makes professional installation essentially mandatory. Pre-charged systems eliminate these requirements by having the refrigerant already sealed inside the line set at the factory with quick-connect fittings that don't require brazing or flaring. The 95%+ DIY success rate with pre-charged systems comes from their simplification of the most technically demanding aspects of installation. You'll still need basic tool skills (using a drill, measuring, cutting), comfort working on a ladder for wall-mounting, and ability to follow detailed instructions carefully. The electrical connection may require hiring an electrician separately ($200-400) if you're not comfortable with that aspect, but the line set installation itself is completely achievable for first-time DIYers using pre-charged systems. Zone provides comprehensive video guides and 24/7 tech support specifically to walk you through each step, with real technicians available to answer questions during your installation weekend.
What's the difference between pre-charged and standard line sets?
Pre-charged line sets come from the factory with refrigerant already sealed inside and use quick-connect fittings that couple the lines to indoor and outdoor units without any refrigerant handling, vacuum pumps, or specialized tools. You simply run the lines, connect both ends with a wrench, and release the pre-charged refrigerant into the system—the entire process takes 2-4 hours for most DIYers. Standard line sets arrive as empty copper tubing that must be connected using flare fittings or brazed connections, then evacuated to remove all air and moisture using a vacuum pump (30+ minutes), leak-tested with nitrogen, and finally charged with the exact amount of refrigerant specified by the manufacturer using manifold gauges and refrigerant tanks. This process requires EPA 608 certification (legally required for refrigerant handling), costs $400-800 in specialized tools, and takes 6-10 hours even for experienced technicians. The pre-charged premium is typically $50-150 more than standard line sets, but you save $1,500-3,000 in professional installation labor and eliminate the risk of improper refrigerant charge (the #1 cause of reduced efficiency and premature compressor failure). For Zone DIY Series systems, pre-charged line sets are included with every DIY package and warranty coverage remains completely intact with proper DIY installation.
How do I route line sets through walls without causing damage?
Plan your route to minimize length while avoiding obstacles, using the shortest path with fewest penetrations and bends. For wall penetrations, drill pilot holes from inside first, then verify outside positioning before drilling the full 3-3.5 inch hole using a hole saw, angling the hole slightly downward toward the outside (5-10 degrees) to prevent water intrusion. Install wall sleeves immediately to protect refrigerant lines and provide neat finished appearance, seal gaps around the sleeve with closed-cell foam or silicone caulk (never spray foam which can compress lines), and add exterior escutcheon plates for weather protection. Route lines along least-visible paths like behind gutters, under soffits, or along building corners when possible, using external corners to hide vertical runs and planning routes that work with your home's architecture. Install support brackets every 3-4 feet to prevent sagging and vibration, use UV-resistant zip ties or plastic line set covers for additional protection and cleaner appearance, and maintain proper insulation coverage along entire length without gaps (exposed copper causes efficiency loss). Avoid running lines through attics exposed to extreme temperature swings, never route through spaces with potential mechanical damage (garage ceilings, high-traffic areas), keep lines away from heat sources (furnace flues, water heaters), and maintain proper clearances from electrical wiring. The most common mistake is drilling oversized holes then leaving large gaps—proper wall sleeves and sealing prevent air infiltration, insect entry, and moisture damage while maintaining your home's thermal envelope.
Do I need a vacuum pump for DIY mini-split installation?
Not if you use pre-charged line set systems specifically designed for DIY installation like Zone mini-splits. Pre-charged systems are self-evacuating—when you connect the lines and open the service valves, the factory-charged refrigerant pushes out any air in the line set, eliminating the need for vacuum pumps entirely. This makes installation legal for homeowners without EPA certification and dramatically simplifies the process from 6-10 hours down to 2-4 hours. Traditional standard line sets absolutely require vacuum pumps to remove all air and moisture before adding refrigerant—even tiny amounts of moisture cause acid formation that destroys compressors, and trapped air reduces efficiency by 10-30% while causing premature failure. Professional vacuum pumps cost $200-500, require 30-45 minutes of operation to achieve proper vacuum levels (500 microns or below), and need manifold gauge sets ($100-200) to verify proper evacuation. If you already own a mini-split with standard line sets, you cannot skip the vacuum pump step—attempting DIY installation without proper evacuation will void your warranty and likely cause compressor failure within 2-5 years versus the expected 15-20 year lifespan. The $1,500-3,000 professional installation cost for standard systems reflects the specialized equipment and EPA certification required. When purchasing a new system, choosing pre-charged options like Zone saves you money compared to buying standard equipment plus professional installation while delivering identical long-term performance and reliability.
What size line set do I need for my mini-split?
Line set size depends on your indoor unit capacity and must match manufacturer specifications exactly—using incorrect sizes causes poor performance, efficiency loss, and potential compressor damage. Most single-zone systems use 1/4" liquid line and 3/8" or 1/2" suction line depending on capacity: 9,000-12,000 BTU units typically use 1/4" and 3/8", 15,000-18,000 BTU units use 1/4" and 1/2", and 24,000+ BTU units may use 1/4" and 5/8" or larger. Multi-zone systems have different line sizes for each branch and the main outdoor unit connections. Check your equipment manual or the service port labels on outdoor unit—manufacturers print correct line sizes directly on the unit for reference. When ordering line sets, you also need the correct length: measure the actual route distance (not straight-line distance) from indoor unit to outdoor unit, add 2-3 feet for connection flexibility and routing around obstacles, and round up to the next standard length (15', 25', 35', 50'). Longer line sets slightly reduce efficiency (about 1-2% per 25 feet) but using too-short line sets is impossible to install and too-long line sets create unnecessary coils that look sloppy and potentially trap oil. Zone DIY Series systems include properly-sized pre-charged line sets with your equipment package, eliminating guesswork and ensuring perfect compatibility—just select your indoor unit capacity and route length when ordering and the correct line set arrives ready to install.
How long does DIY line set installation take?
Pre-charged line set installation typically takes 2-4 hours for first-time DIYers and 1-2 hours for those with some experience, covering line set routing, wall penetration, securing the lines, connecting both ends, and releasing refrigerant. Standard line sets requiring vacuum pumps take 6-10 hours even for experienced installers due to the additional steps of creating leak-free connections, evacuating the system for 30-45 minutes, leak testing, and charging with refrigerant to exact specifications. Your actual time depends on several complexity factors: simple installations with short runs (under 25 feet), easy wall penetrations (wood frame construction), and accessible locations (first floor, minimal obstacles) fall on the faster end, while complex installations with longer runs (35-50 feet), difficult penetrations (brick, concrete, multiple walls), or challenging locations (second story, routing around decks or additions) take longer. Most DIYers spread installation over a weekend: Day 1 for planning the route, drilling wall penetrations, running the line sets, and securing everything properly; Day 2 for making connections, testing operation, and cleanup. Common time-wasters include poor planning (realizing mid-install your route won't work), inadequate tools (making multiple hardware store trips), and unclear instructions (stopping to research steps online). Zone DIY Series systems minimize installation time with pre-planned routing templates, complete tool lists provided before you start, and video guides showing each step in real-time so you can follow along at your own pace.
What tools do I actually need for DIY line set installation?
For pre-charged line set systems like Zone, you need basic tools most homeowners already own: drill with 3-3.5 inch hole saw for wall penetrations, adjustable wrench or torque wrench for tightening line set connections, torpedo level for leveling indoor unit, tape measure for planning routes and checking clearances, and ladder appropriate for your mounting height. Additional helpful tools include stud finder for locating wall studs, pencil for marking mounting holes, utility knife for cutting insulation, and Phillips/flat head screwdrivers for electrical connections. Zone provides everything else you need: pre-charged line sets with quick-connect fittings, mounting brackets and hardware, wall sleeves and escutcheon plates, installation manual and video guides, and 24/7 tech support for questions during install. For standard line set systems (not pre-charged), you need significantly more specialized equipment: vacuum pump ($200-500) for evacuating air and moisture, manifold gauge set ($100-200) for monitoring pressure and vacuum levels, refrigerant scale ($50-100) for measuring charge amount, flaring tool ($30-100) if using flare connections, tubing cutter ($15-40) for cutting copper to length, deburring tool ($10-20) for cleaning cut edges, and refrigerant recovery equipment if you need to remove existing refrigerant. You'll also need EPA 608 certification to legally purchase and handle refrigerant. The total tool cost for standard installation is $400-1,000+ versus $0-50 for pre-charged systems, which is why pre-charged systems make DIY installation practical and cost-effective for homeowners who don't want to invest in specialized HVAC tools they'll only use once.
Ready to start your DIY installation? Browse our complete mini-split systems with included pre-charged line sets, or call (801) 882-2324 to speak with a technical specialist who can help you plan your specific installation.