Tom Chen ignored the performance warnings for eight months. If you're asking "how do I maintain my mini split?" you'll want to learn from Tom's expensive mistake.
Quick maintenance essentials: Clean filters monthly (5 minutes). Inspect outdoor unit quarterly for debris. Schedule professional service annually ($100-$200). These simple tasks prevent 90% of mini-split problems and keep your system running at peak efficiency for 15-20 years.
His mini-split still cooled his Denver home office—sort of—but the unit ran constantly, struggled to maintain 72°F on warm afternoons, and his summer electric bills crept from $85 to $140 monthly. He assumed his three-year-old system was simply working harder during an unusually hot summer. When condensation started dripping from the indoor unit onto his desk one August afternoon, he finally called for service.
The HVAC technician spent ninety minutes on what should have been a fifteen-minute service call. Tom's filters—which he'd never cleaned once in three years of daily operation—were so clogged that barely any air could pass through. The outdoor coil had accumulated so much cottonwood seed fluff that it looked more like a pillow than heat exchanger fins. The condensate drain had formed a solid algae blockage, causing the overflow. "Your compressor is working three times harder than it should," the technician explained while presenting a $285 service bill. "You're probably shortening your system's life by five to eight years."
That $285 wake-up call taught Tom an expensive lesson about the critical difference between owning a mini-split and maintaining one. After the service, his electric bill immediately dropped back to $88 monthly—saving $52 every month going forward. The unit cooled effortlessly again, cycling normally instead of running continuously. The technician's parting advice stuck with Tom: "Fifteen minutes of filter cleaning every month would have prevented all of this. Mini-splits are incredibly reliable when maintained, but remarkably efficient at hiding problems until they become expensive."
Tom now sets a monthly phone reminder for filter cleaning, inspects his outdoor unit quarterly, and schedules annual professional service every spring. His system runs as efficiently as the day it was installed, his bills stay predictable, and he'll likely get the full 18-20 year lifespan from his investment instead of the 10-12 years neglect would have delivered. This guide provides the complete maintenance knowledge Tom wishes he'd had from day one—everything you need to keep your mini-split running perfectly while avoiding expensive lessons.
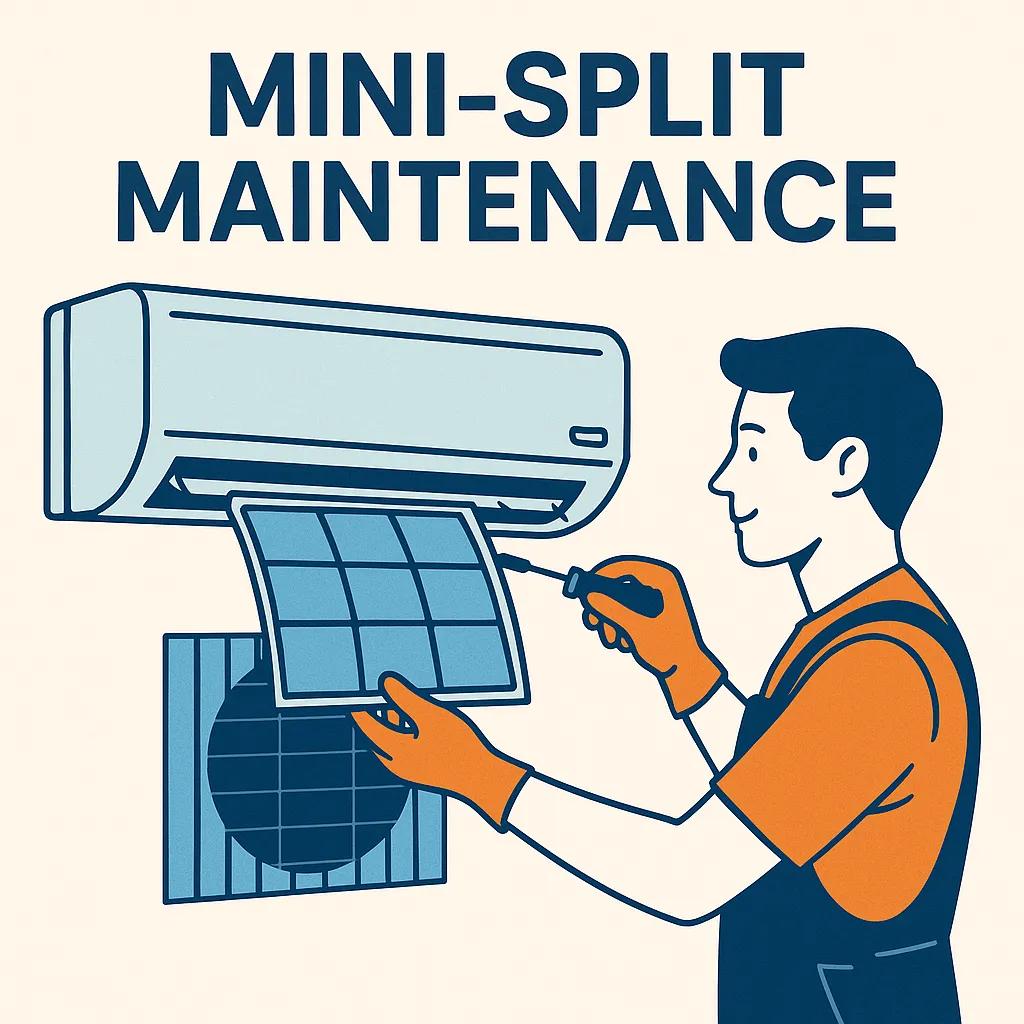
How to Clean Your Mini Split: Monthly Maintenance
Clean Indoor Unit Filters
Most important maintenance task:
- Turn off unit
- Open front panel
- Remove filters (slide or lift out)
- Vacuum or rinse with water
- Let air dry completely
- Reinstall filters
Why Monthly:
- Dirty filters reduce efficiency 5-15%
- Restrict airflow
- Strain compressor
- Increase electricity costs
Pro Tip: Set a monthly phone reminder.
Quarterly Maintenance (30 minutes)
Indoor Unit Deep Clean:
- Wipe down front panel
- Clean louvers and vents
- Check condensate drain for clogs
- Vacuum around unit
- Inspect for unusual sounds
Outdoor Unit Check:
- Clear debris (leaves, grass, dirt)
- Trim vegetation (12" clearance)
- Straighten bent fins gently
- Check for animal damage
- Ensure level installation
Seasonal Maintenance
Spring (Preparing for Cooling Season):
- Deep clean both filters
- Wash outdoor coil with hose
- Check refrigerant lines for damage
- Test cooling mode
- Verify condensate drain flows
- Set summer temperature schedule
Fall (Preparing for Heating Season):
- Clean filters thoroughly
- Test heating mode
- Check outdoor unit for debris
- Verify defrost function works
- Set winter temperature schedule
- Consider protective cover for extreme climates
Annual Professional Service
What Pros Check ($100-$200):
- Refrigerant pressure levels
- Electrical connections
- Compressor operation
- Reversing valve (heat pumps)
- Thermostat calibration
- Duct condition (if applicable)
- Deep coil cleaning
- Performance testing
When to Schedule:
- Spring before cooling season OR
- Fall before heating season
- Every 12-18 months minimum
Mini Split Filter Cleaning: Step-by-Step Guide
Washable Filters:
- Remove carefully
- Vacuum first (removes dry dust)
- Rinse with lukewarm water
- Use mild soap if very dirty
- Rinse thoroughly
- Shake off excess water
- Air dry completely (2-4 hours)
- Never reinstall wet filters
Signs Filters Need Replacement:
- Tears or holes
- Permanent odor
- Won't come clean
- 2-3 years old
Replacement Cost: $15-$30 per filter set
Condensate Drain Maintenance
Why It Matters: Clogged drains cause water leaks and damage.
Monthly Check:
- Pour cup of water in drain pan
- Verify it drains outside
- Check for pooling water
Annual Deep Clean:
- Mix 1:1 vinegar and water
- Pour into drain line
- Let sit 30 minutes
- Flush with water
- Use pipe cleaner if needed
Clog Prevention:
- Add condensate tablets (algaecide)
- Cost: $10/year
- Prevents algae growth
Outdoor Unit Care
Coil Cleaning (Twice Yearly):
- Turn off power at disconnect
- Remove debris from top and sides
- Gently spray coils with hose
- Use coil cleaner for heavy buildup
- Rinse from inside-out
- Let dry before powering on
Winter Protection:
Do:
- Clear snow from around unit
- Remove ice buildup gently
- Keep vents clear
Don't:
- Cover unit completely (traps moisture)
- Use heaters to melt ice
- Chip ice with sharp tools
Common Maintenance Mistakes
Mistake #1: Neglecting Filters Result: 15% efficiency loss, $100+/year wasted
Mistake #2: Pressure Washing Coils Result: Bent fins, damaged coil, expensive repairs
Mistake #3: Covering Unit Year-Round Result: Moisture buildup, rust, mold
Mistake #4: Ignoring Strange Sounds Result: Small issue becomes major failure
Mistake #5: DIY Refrigerant Work Result: Illegal, dangerous, voids warranty
Maintenance Schedule Template
Monthly: □ Clean filters □ Check for leaks □ Listen for unusual sounds
Quarterly: □ Clean outdoor unit □ Vacuum indoor unit □ Check condensate drain
Spring: □ Test cooling mode □ Deep clean coils □ Check electrical connections
Fall: □ Test heating mode □ Clear outdoor debris □ Verify defrost works
Annually: □ Professional service □ Replace filters if needed □ Check refrigerant (pro only)
Efficiency Monitoring
Track Performance:
Monthly:
- Note electricity usage
- Compare to previous month
- Calculate cost per sq ft
Warning Signs:
- 15%+ usage increase
- Struggling to cool/heat
- Frequent cycling
- Ice on indoor unit
- Water leaks
When to Call Pro: Any of above persists after basic maintenance.
Extending System Lifespan
Average Lifespan:
- Poor maintenance: 8-12 years
- Basic maintenance: 12-15 years
- Excellent maintenance: 15-20+ years
Maintenance ROI:
- Annual cost: $150 (DIY + 1 pro visit)
- Extra lifespan gained: 3-8 years
- Avoided replacement cost: $3,000-$5,000
- ROI: 20:1 over system life
Troubleshooting Common Issues
Unit Won't Turn On:
- Check power switch
- Verify circuit breaker
- Replace remote batteries
- Reset unit (power cycle)
Poor Cooling/Heating:
- Clean filters
- Check for obstructions
- Verify temperature setting
- Check outdoor unit running
Water Leaking:
- Check condensate drain
- Verify unit is level
- Clean filters
- Check for frozen coil
Strange Noises:
- Check for loose panels
- Clear debris from outdoor unit
- Tighten mounting brackets
- Call pro if persists
Seasonal Startup Procedures
First Cooling Use (Spring):
- Clean filters
- Check outdoor unit clear
- Set to cooling mode
- Set temp 5°F below room temp
- Listen for normal operation
- Verify cold air within 5 min
First Heating Use (Fall):
- Clean filters
- Set to heating mode
- Set temp 5°F above room temp
- May smell slightly (normal)
- Verify warm air within 5-10 min
- Watch for defrost cycle
Long-Term Storage
If Not Using 3+ Months:
- Run fan-only mode 3-4 hours (dries unit)
- Clean filters thoroughly
- Wipe down all surfaces
- Cover indoor unit loosely
- Note outdoor unit location (clear seasonally)
- Cut power at breaker
Restart Procedure:
- Remove covers
- Inspect for damage
- Clean filters
- Run fan mode 1 hour
- Start normally
Warranty Considerations
Most Warranties Require:
- Annual professional service
- Proper maintenance records
- Use of certified technicians
Keep Records:
- Service dates
- Work performed
- Technician company
- Photos if needed
Voiding Warranty:
- DIY refrigerant work
- Unauthorized modifications
- Improper installation
- Lack of maintenance
Cost of Neglect
Example: Neglected 12K System
Year 1:
- Dirty filters: +$60 electricity
- Skipped service: -$150 saved
- Net: -$90 "savings"
Year 5:
- Cumulative extra electricity: $350
- Reduced capacity: Uncomfortable
- Early failure: $2,500 replacement
- Total cost: $2,850
vs. Maintained System:
- Annual maintenance: $150
- 5-year cost: $750
- Still running efficiently
- Savings: $2,100
DIY vs Professional Maintenance
You Can Do:
- Filter cleaning
- Basic cleaning
- Visual inspections
- Drain flushing
- Debris removal
Hire Pro For:
- Refrigerant work
- Electrical repairs
- Compressor issues
- Major cleaning
- Annual checkup
Cost Comparison:
- DIY annual: $50 (supplies)
- Plus 1 pro visit: $150
- Total: $200/year
vs.
- Full professional: $300-$400/year
- DIY savings: $100-$200/year
Bottom Line
Now you know how to properly clean and maintain your mini split system. Here's the investment:
Time Investment:
- Monthly: 15 minutes
- Quarterly: 30 minutes
- Seasonal: 1 hour
- Total: ~5 hours/year
Cost Investment:
- Supplies: $50/year
- Professional service: $150/year
- Total: $200/year
Returns:
- 5-10 year longer lifespan
- 15-20% better efficiency
- Fewer repairs
- Lower electricity bills
- Value: $3,000-$5,000 over system life
Proper maintenance is the best investment in your mini-split system. Start today with a simple filter cleaning.
Frequently Asked Questions
How often should I clean my mini split?
Clean mini split filters every 2-4 weeks during heavy use (monthly minimum). Deep clean the indoor unit every 3-6 months. Professional service annually. Outdoor unit: inspect quarterly, clean as needed. More frequent cleaning in dusty/pet-heavy environments improves efficiency by 15-20% and prevents system issues.
Can I clean my mini split myself?
Yes! Most mini split maintenance is DIY-friendly. Monthly filter cleaning takes 5 minutes. Deep cleaning (coils, drain) takes 30-60 minutes with basic supplies ($20-40). Only refrigerant work requires professionals. DIY maintenance saves $200-300/year compared to full professional service while keeping your system running optimally.
What happens if I don't clean my mini split?
Neglected mini splits lose 15-30% efficiency, increasing electric bills. Dirty filters restrict airflow, forcing the compressor to work harder (reducing lifespan). Clogged drains cause water leaks and mold growth. Dirty coils reduce cooling/heating capacity. A system that should last 15-20 years may fail in 8-10 years. Regular cleaning prevents all of these issues.
How do I clean mini split filters?
Remove the front cover, slide out the filters, vacuum off loose dust, wash with warm water and mild soap, rinse thoroughly, air dry completely (2-3 hours), reinstall. Never run the unit with wet filters. Washable filters last the life of the system with proper care. Clean every 2-4 weeks during use.
How much does mini split maintenance cost?
DIY maintenance: $50-100/year (supplies only). Professional annual service: $150-250. Full professional maintenance package: $300-400/year. Most homeowners do monthly filter cleaning themselves ($0) and hire professionals annually for deep cleaning ($150-250), totaling $150-250/year.
Do mini splits need yearly maintenance?
Yes. Annual professional maintenance is recommended for warranty compliance, safety checks, refrigerant level verification, electrical inspection, and deep component cleaning. While monthly filter cleaning is DIY-friendly, yearly professional service catches issues early, maintains efficiency, and extends system life 5-10 years. Cost: $150-250, value: $3,000-5,000 over system lifetime.
Related Articles: