DIY Wall Mounted Mini Split Systems: Easy Install Mini Splits by Zone Air
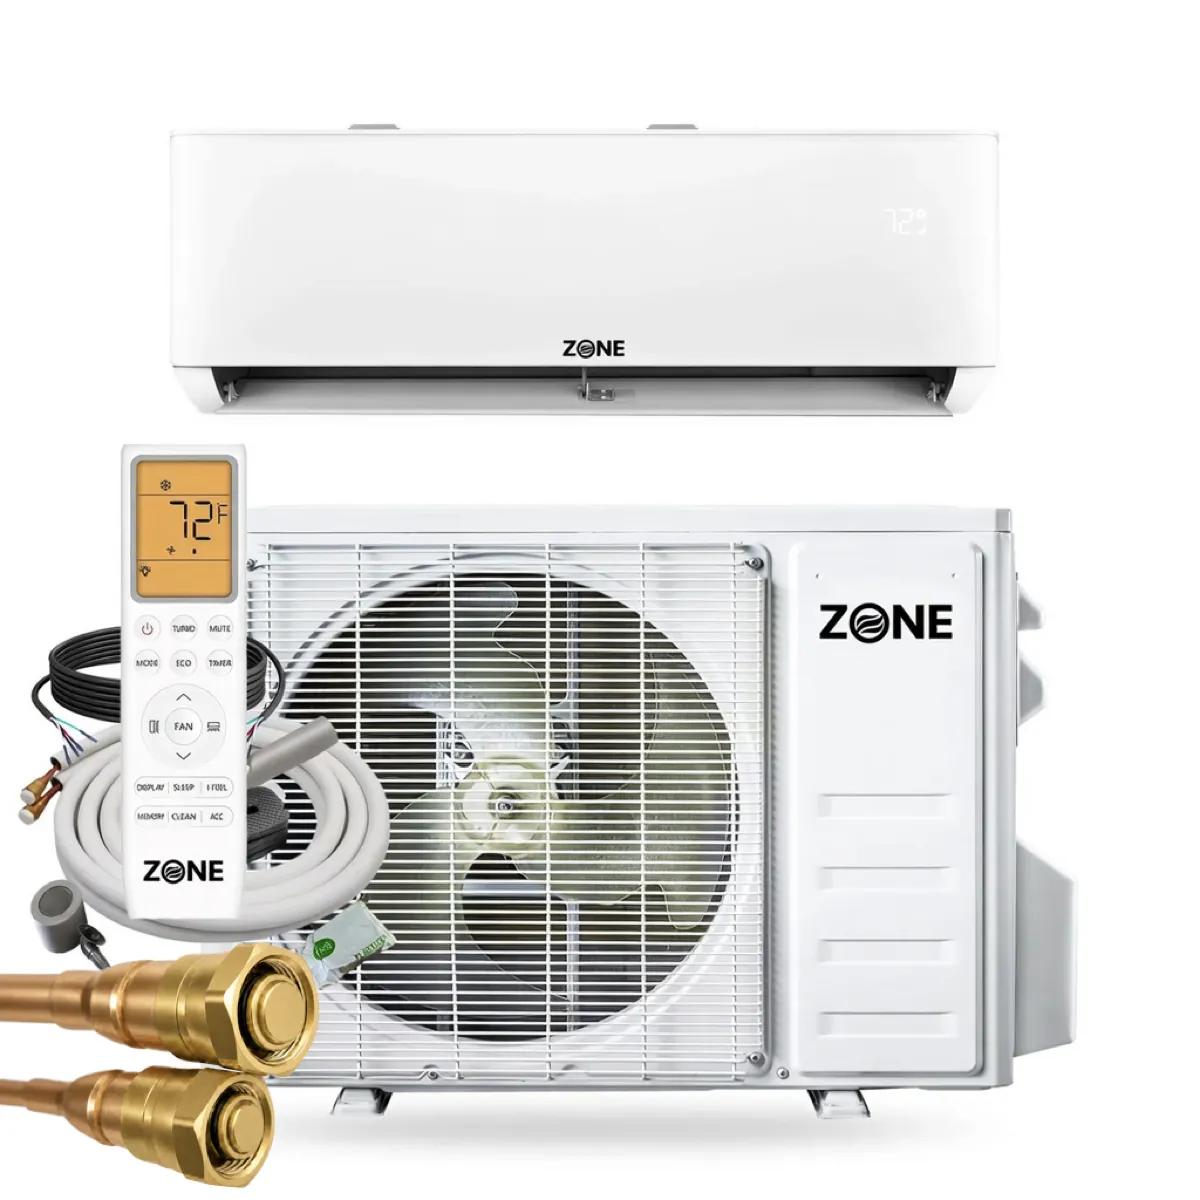
Wall mounted mini splits — also called ductless wall units or mini split wall units — mount a slim indoor head high on an exterior wall and pair it with a single outdoor condenser through one 3-inch refrigerant line. They're the most popular and easiest-to-install ductless form factor: no ceiling cavity, no ductwork, just one bracket, one wall penetration, and a pre-charged lineset.
Want zoned comfort in one room without an HVAC contractor? See the systems.
Shop Wall Mount Systems ↓- ✓Easiest, fastest DIY install of any ductless form factor — 4–6 hours
- ✓9K, 12K, and 18K BTU for rooms from 300 to 850 sq ft
- ✓115V plug-in (standard outlet) or 230V options
- ✓Up to 24 SEER2 with heat pump heating down to -13°F
- ✓Pre-charged R-454B quick connect linesets — no vacuum pump
“A wall mount is the form factor I point first-time DIYers to — pick a clear exterior wall section, get the lineset penetration sloped slightly toward the outside for the condensate, and torque the quick connect fittings to spec. With a pre-charged lineset there's no vacuum pump and no refrigerant handling, so a careful homeowner with two people can have one running in an afternoon. The 115V models plug into a standard outlet, which skips the electrician entirely on most 9K and 12K rooms.”
Benefits of a Wall Mount Mini Split
Why a wall mounted mini split is the go-to ductless pick when you want zoned comfort in one room fast — and the lowest-cost, simplest path to DIY heating and cooling.
Fastest, easiest install
Just one wall bracket, one 3-inch lineset penetration, and the outdoor condenser. A first-time DIY wall mount install runs 4–6 hours with two people — the simplest of any ductless form factor, easier than cassettes or concealed-duct units.
115V plug-and-play option
The 9K and 12K 115V models plug into a standard household outlet — no new circuit, no electrician, no panel work. For most single-room retrofits that means one fewer trade and a lower all-in cost.
Lowest-cost form factor
Wall mounts are the least expensive way to get into ductless. No ceiling cavity, no ductwork, no recessed framing — systems start at $1,899, the lowest entry point in the Zone Air lineup.
Easy filter access & maintenance
The indoor head sits exposed on the wall, so the washable filters lift out in seconds — no ladder into a ceiling, no removing a cassette grille. Routine cleaning takes minutes.
Fits almost any room
Bedrooms, home offices, finished basements, garages, sunrooms, and additions — any space with a clear exterior wall section works. 9K–18K BTU covers rooms from 300 to 850 sq ft.
Up to 24 SEER2 efficiency
Inverter compressors reach 24 SEER2 on 230V models — among the highest efficiency in the lineup — with heat pump heating down to -13°F so one unit handles both seasons.
Wall Mounted Mini Split Systems
Wall-mounted mini splits are the most popular and easiest-to-install ductless form factor — one slim indoor unit mounted high on the wall, paired with a single outdoor condenser through a 3-inch refrigerant line. Zone Air wall mounts cover 9,000 to 18,000 BTU, fit rooms from 300 to 850 sq ft, and deliver 22–24 SEER2 efficiency with heat-pump heating down to -13°F. The 115V models plug into a standard household outlet — no electrician needed — while 230V models support larger spaces and multi-zone configurations. Every system ships with a pre-charged R-454B quick connect lineset for DIY installation in 4–6 hours.
Single-Zone Systems
One indoor unit, one outdoor unit — for a single room.
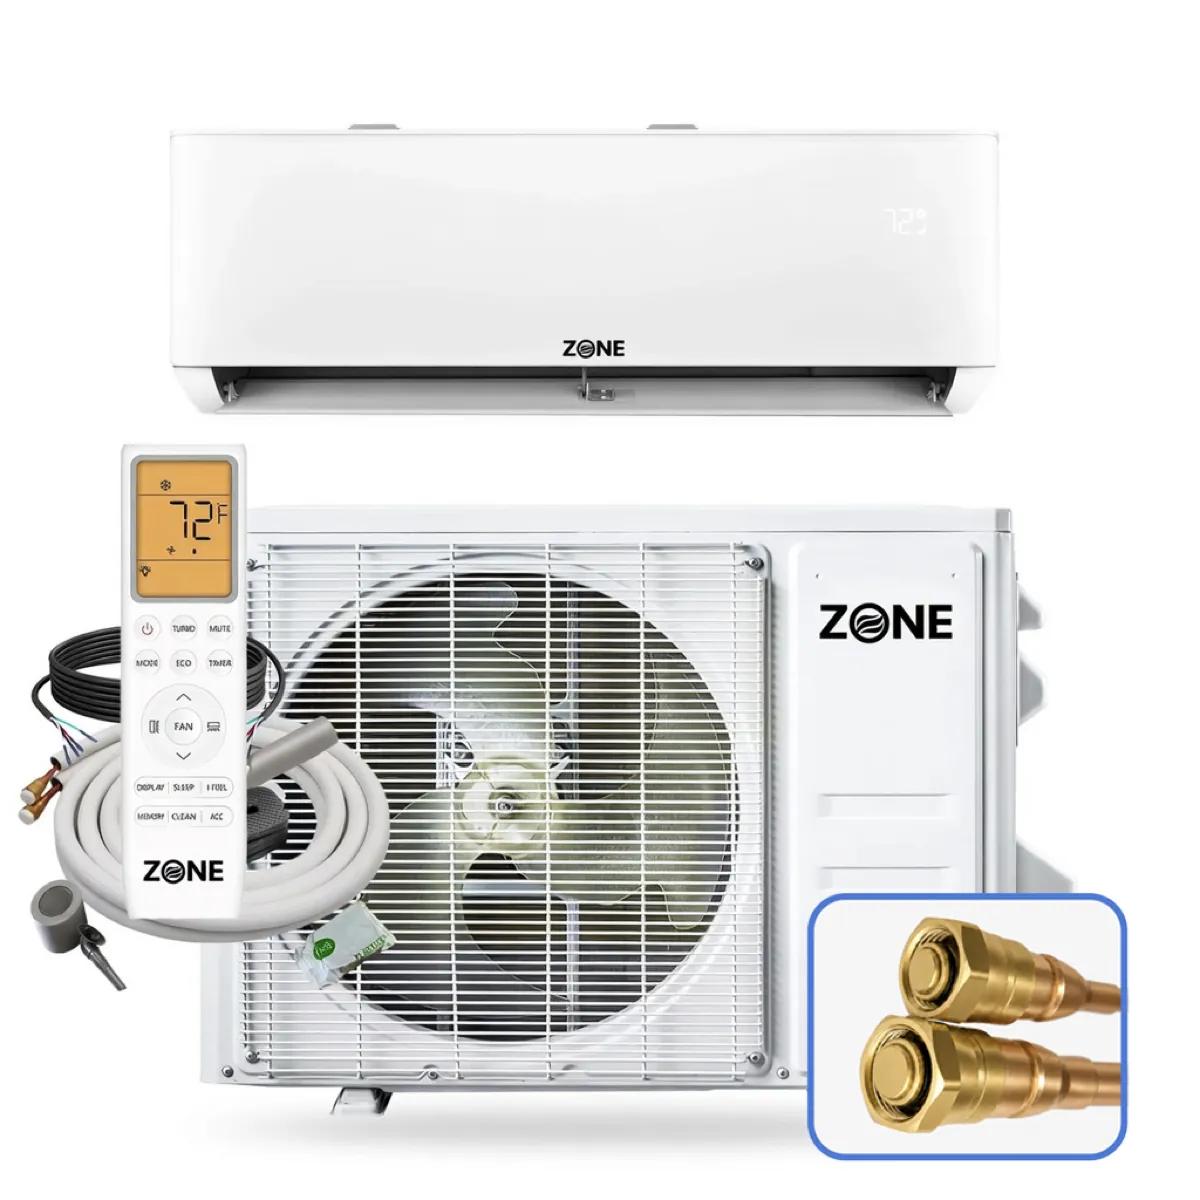
Zone Air® DIY 9,000 BTU 23 SEER2 115V Wall Mount Ductless Mini-Split Heat Pump AC & Heater with Pre-Charged Lineset - Up to 450 Sq Ft
Zone Air® DIY 12,000 BTU 23 SEER2 115V Wall Mount Ductless Mini-Split Heat Pump AC & Heater with Pre-Charged Lineset - Up to 600 Sq Ft
Zone Air® DIY 9,000 BTU 24 SEER2 230V Wall Mount Ductless Mini-Split Heat Pump AC & Heater with Pre-Charged Lineset - Up to 450 Sq Ft
Zone Air® DIY 12,000 BTU 24 SEER2 230V Wall Mount Ductless Mini-Split Heat Pump AC & Heater with Pre-Charged Lineset - Up to 600 Sq Ft
Zone Air® DIY 18,000 BTU 23.5 SEER2 230V Wall Mount Ductless Mini-Split Heat Pump AC & Heater with Pre-Charged Lineset - Up to 900 Sq Ft
Multi-Zone Bundles
Two indoor heads sharing one outdoor condenser — cool/heat two rooms with one system.
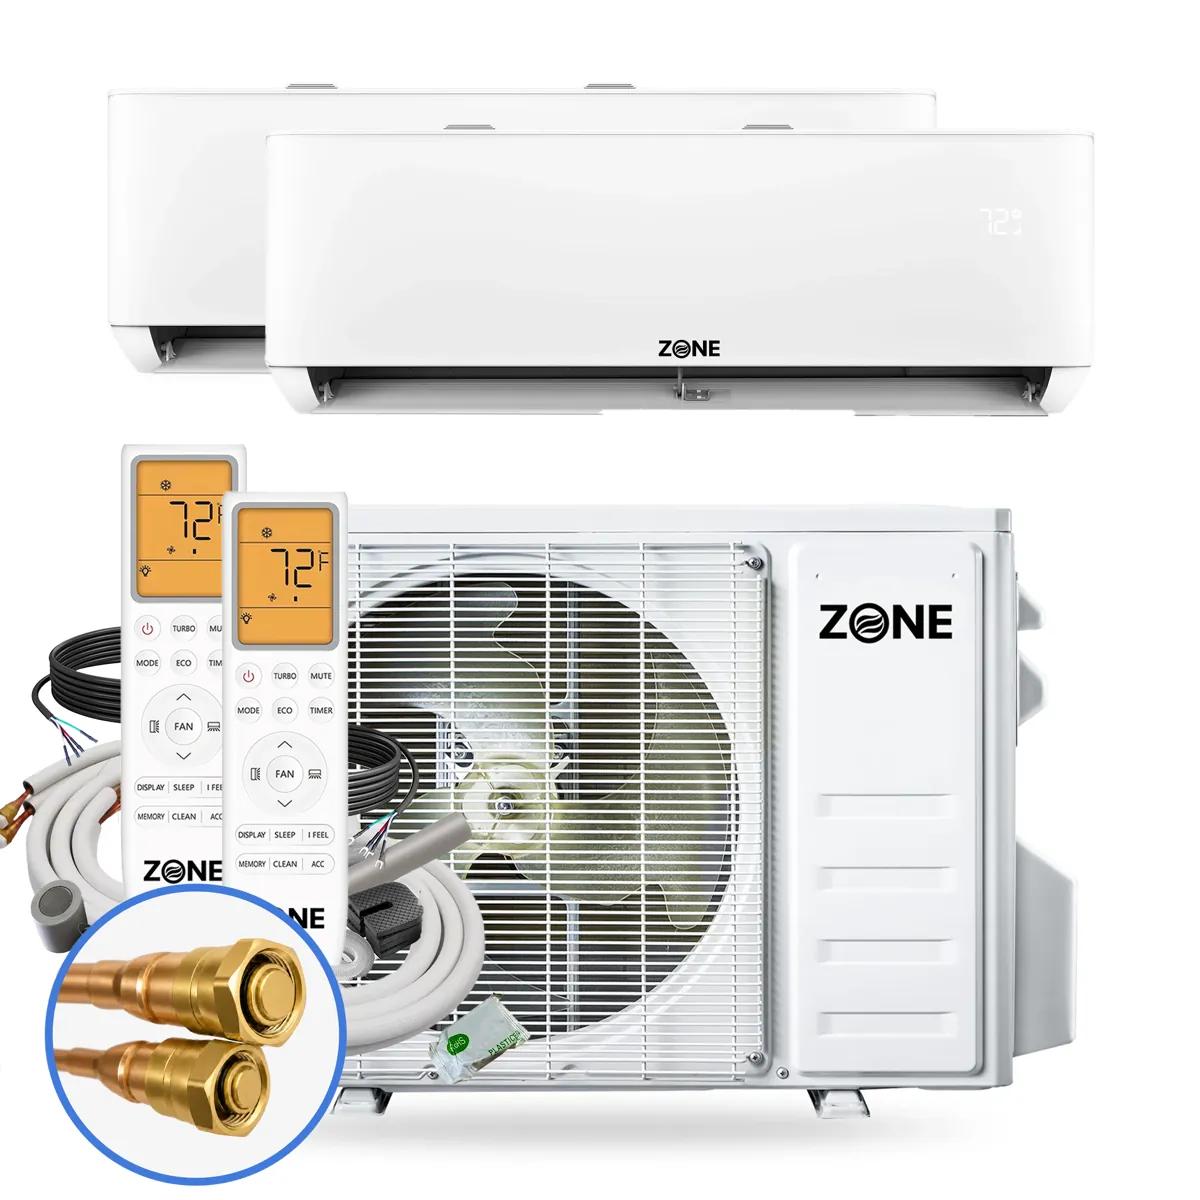
Zone Air® DIY DUAL ZONE 24,000 BTU (12K+12K) 24 SEER2 230V Wall Mount Ductless Mini-Split Heat Pump System with 2x Pre-Charged Linesets - Up to 1,200 Sq Ft
Zone Air® DIY DUAL ZONE 21,000 BTU (12K+9K) 24 SEER2 230V Wall Mount Ductless Mini-Split Heat Pump System with 2x Pre-Charged Linesets - Up to 1,050 Sq Ft
Zone Air® DIY DUAL ZONE 30,000 BTU (12K+18K) 24 SEER2 230V Wall Mount Ductless Mini-Split Heat Pump System with 2x Pre-Charged Linesets - Up to 1,500 Sq Ft
Zone Air® DIY DUAL ZONE 18,000 BTU (9K+9K) 24 SEER2 230V Wall Mount Ductless Mini-Split Heat Pump System with 2x Pre-Charged Linesets - Up to 900 Sq Ft
Looking for an efficient heating and cooling solution you can install yourself? Wall mounted DIY mini splits deliver zoned comfort without expensive duct work, major remodeling or full contractor installation. These ductless systems use an indoor wall unit, an outdoor heat pump and, in many DIY models, pre-charged line sets that simplify setup and reduce installation costs.
Discover how to choose, install and optimize your wall mounted mini split system today.
Wall Mounted DIY Mini Split Systems for Every Space
Whether you're upgrading one room or planning comfort across multiple rooms, there's a wall mounted solution for nearly every space in the house.
Home Additions and New Rooms
Wall mounted DIY mini split systems are ideal for finished basements, attics, sunrooms, garage conversions and new additions where existing duct work is unavailable or difficult to extend. Because ductless systems do not require expensive ductwork, installation is quicker than traditional HVAC projects that often involve extensive ductwork installation.
A 9,000 to 24,000 BTU unit can typically serve spaces from about 300 to 1,200 square feet, depending on insulation, layout and climate. Many DIY mini split systems come with pre-charged line sets, which simplify the installation process and eliminate the need for a licensed HVAC technician for refrigerant charging when the sealed circuit is not opened. The installation of DIY mini split systems can typically be completed in just a few hours, significantly reducing the time and cost compared to traditional HVAC installations.
Garages and Workshop Spaces
For garages, studios and workshop spaces, a cold climate wall mounted mini split can provide dependable heating and cooling without running new ducts. Some cold climate certified systems operate efficiently down to -22°F, making them practical for year-round work areas in harsh winter regions.
High-efficiency models with ratings up to 24 SEER2 help reduce energy costs while keeping airflow consistent. Quiet operation, often under 19 dB on low settings, helps keep a workshop comfortable without distracting noise, while WiFi controls allow you to warm or cool the space before you start your project.
Master Bedrooms and Home Offices
A wall mounted mini split is especially useful in bedrooms and home offices because it gives you individual zone control. Ductless systems provide flexibility in temperature control, allowing homeowners to heat or cool individual rooms or zones independently, which can lead to increased comfort and efficiency.
Sleep mode, timer functions and precise degree-by-degree settings help reduce energy waste overnight or during focused work time. Zone control in mini split systems allows for cooling specific rooms individually and can save energy by reducing the need for cooling common areas, so you are not paying to condition the whole house when only one room needs comfort.
Choose the Right Wall Mounted Mini Split for Your Needs
The right capacity, efficiency rating and installation type help your system run properly, save energy and last longer.
For Small Spaces (300–500 sq ft)
For bedrooms, small offices and compact bonus rooms, a 9,000 BTU mini split often provides efficient heating and cooling without oversizing the system. Compact indoor units fit discreetly on most walls and are a good option for first-time DIY installers.
DIY mini split systems are designed for easy installation, allowing homeowners to set them up without specialized training or expensive tools when using approved pre-charged equipment. Compared with a standard HVAC install, a small ductless unit is usually faster, cleaner and less disruptive.
For Medium Spaces (500–800 sq ft)
For larger bedrooms, living rooms and open work areas, a 12,000 to 15,000 BTU system offers a strong balance of comfort and efficiency. Variable-speed compressors adjust output to match demand, which keeps temperatures steady instead of constantly turning the system on and off.
Advanced filtration can support better indoor air quality, while multi-stage heating improves comfort in colder conditions. The key word is balance: the unit should be large enough for the space, but not so large that it short cycles and wastes energy.
For Large Spaces (800–1,200 sq ft)
For open concept rooms, large additions and high-use areas, 18,000 to 24,000 BTU systems deliver stronger heating and cooling capacity. Inverter technology helps maintain precise temperature control while reducing energy waste during partial-load operation.
Mini split systems can achieve energy savings of up to 30% compared to traditional HVAC systems due to their high efficiency and targeted heating and cooling capabilities. Extended warranty coverage, professional-grade components and DIY-friendly packages make these systems a practical choice when you want strong performance without a full central HVAC replacement.
Advanced Features That Make the Difference
Modern wall mounted mini splits combine efficient mechanical design with smart control features that make everyday comfort easier to manage.
Pre-Charged Line Sets
Pre-charged line sets are one of the main reasons a wall mounted DIY mini split is manageable for homeowners. Many systems use R-454B refrigerant in quick connect line sets, reducing the need for manifold gauges, vacuum pumps or refrigerant charging when the installation follows the manufacturer's sealed-system instructions.
Installing a wall mounted mini split yourself is manageable with pre-charged systems, but standard systems require specific HVAC tools and proper handling of electrical and refrigerant lines to avoid warranty issues. Pressure testing the system with nitrogen before releasing refrigerant is essential to test for leaks, and lines must be evacuated using a vacuum pump to remove air and moisture on standard or non-pre-charged installations.
Smart Controls and WiFi Connectivity
Smart controls make it easier to manage comfort without constantly adjusting the indoor unit. App-based control can handle temperature, scheduling and energy monitoring, while voice control compatibility with Alexa and Google Assistant adds hands-free convenience.
Geofencing can automatically adjust settings when you leave home, and usage reports help compare running patterns over time. In bedrooms, sleep mode can gradually adjust temperature to support comfort while lowering energy use overnight.
Energy Efficiency, Duct Work, and Certifications
Energy Star certification on mini split systems indicates that they meet strict energy efficiency guidelines set by the U.S. Environmental Protection Agency, leading to lower energy bills for consumers. Homeowners may also qualify for energy efficiency rebates and tax credits when installing high-efficiency mini split systems, which can significantly reduce the overall cost of the system.
The SEER2 rating is a new efficiency standard for air conditioning systems that measures their cooling efficiency under specific conditions, replacing the previous SEER standard. Mini split systems can achieve SEER2 ratings as high as 24, indicating their potential for high energy efficiency and lower operational costs. Higher SEER2 ratings generally correlate with lower energy consumption, which can lead to significant savings on utility bills over time.
Installation and Setup Process
Wall mounted mini splits are designed for straightforward installation, but good planning, correct placement and safe electrical work are essential.
Pre-Installation Planning
Start by measuring the room, checking insulation levels and calculating BTU requirements before choosing a system. Then choose an indoor wall position that supports good airflow across the room and allows proper service access.
Indoor units should be installed with at least 6–8 inches of clearance from the ceiling and corners, while outdoor units must be placed on a solid, level concrete pad or wall bracket, not exceeding specific distance limitations from the indoor unit. Also verify electrical requirements, local permit rules and whether a licensed electrician is needed for the circuit.
Mounting and Connection Steps
Install the mounting bracket with the provided template, then drill the wall opening at the correct angle for the refrigerant lines, drain line and wiring. The line path should be clean, supported and protected so the system can work safely through heat, cold and weather.
Sealing the hole around the lineset with outdoor-rated silicone caulk or expanding foam is necessary to prevent drafts and pests, and using a plastic line-hide kit helps protect exterior lines from weather. For DIY pre-charged models, connect the line set using the approved quick connect fittings; for standard systems, refrigerant handling, nitrogen pressure testing and vacuum evacuation should be performed with proper HVAC tools and qualifications.
System Startup and Testing
After mounting and connections are complete, power on the system and run the initial setup through the control panel or smart app. Test heating and cooling modes, check airflow, confirm condensate drainage and listen for unusual vibration or sound.
Connect WiFi controls, configure schedules and test sleep mode or timer features. Finally, register the system for warranty coverage and keep photos, model numbers and installation notes with your project records, especially if your unit includes a 5-year manufacturer warranty.
Start Your DIY Mini Split Project Today
Transform your home's comfort with a wall mounted DIY mini split system built for efficient heating, cooling and room-by-room control. Complete DIY packages can reduce installation time, avoid expensive duct work and help lower running costs compared with traditional HVAC systems.
Choose the right size, confirm your electrical and permit needs, and install with care. Your energy-efficient climate control solution is just one installation away.
Wall Mount Mini Split — Real Questions, Honest Answers
When should I pick 115V over 230V?
How long does the install actually take?
What size wall mount do I need for my room?
When is a wall mount the wrong choice?
Does the pre-charged lineset really mean no vacuum pump?
What does a wall mount mini split cost — and what's in the box?
Find Your Perfect Wall Mount Mini Split
From plug-and-play 115V models to high-efficiency 230V systems — Zone Air wall mount mini splits deliver professional HVAC at DIY prices. Free shipping on every order.
Open the Sizing Calculator