Are DIY Mini Splits Really DIY? The Honest Answer Up Front
If you've been shopping for a ductless heat pump and wondering whether DIY mini splits are really DIY, the short answer is yes — some systems are genuinely designed for homeowners to install themselves — but it depends on the unit you buy, your basic electrical and tool skills, and whether you're comfortable drilling, mounting, and wiring parts of the system. These systems can save money and add efficient heating and cooling without ductwork, but some brands still involve steps that call for HVAC knowledge or professional help. (For the systems that are genuinely homeowner-friendly, see the best DIY mini splits.)
Most DIY mini split systems still demand careful planning, basic electrical skills, and comfort drilling through walls. Pre charged line sets and quick connects have made installation dramatically easier than traditional systems, but they don't remove every challenge: you'll still be lifting heavy equipment, routing a line set through your wall, and dealing with a dedicated circuit.
Here's the real divide: some brands market "DIY" on the box but still assume an HVAC tech will finish the job — Senville and Pioneer ship flare-fitting copper lines that need a vacuum pump and licensed refrigerant work. The true DIY category is different: MRCOOL DIY brought quick-connect installation to the market, and Zone Air engineered its entire lineup around the homeowner from unboxing to commissioning — every unit ships with factory-sealed, pre-charged quick-connect line sets, eliminating the vacuum pump and EPA license entirely. If you're still wondering whether they're worth it, see are DIY mini splits any good.
For most homeowners, a true DIY mini split is realistic if you can follow a manual, handle basic wiring, and aren't afraid of a drill. If tools and electrical work make you uneasy, hiring a pro remains the safer door to walk through.
How DIY Mini Splits Work (and How They Differ from Traditional Systems)
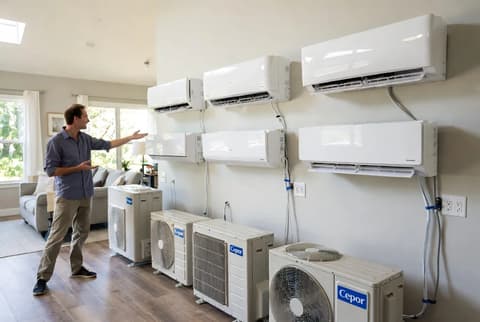
A mini split is a ductless system pairing an outdoor unit (the heat pump) with one or more indoor air handlers. They've surged in popularity for garages, bonus rooms, and home offices — spaces where adding ductwork would be expensive or impossible.
Key components include:
- An outdoor heat pump with an inverter compressor for efficient, variable-speed operation
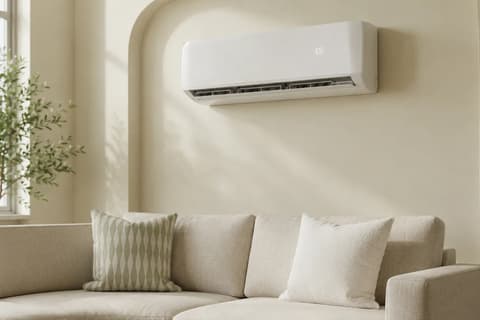
- An indoor wall-mounted air handler or ceiling cassette
- A pre charged refrigerant line set that ships factory-sealed
- A condensate drain line
- A control system (remote, thermostat, or app)
Traditional non-DIY mini splits require a pro to braze copper, pull a vacuum, and charge refrigerant. True DIY systems avoid this with factory-sealed lines that connect without specialized HVAC equipment.
Compared to central HVAC — which relies on a single air handler pushing conditioned air through ducts — mini splits cool and heat zones individually. They avoid duct losses (often 25–40% of energy), and skip expensive ductwork installation entirely. Multi-zone systems can run several heads off one outdoor unit, making them a practical, more efficient replacement for a window unit in every room. For a whole-house setup, see our page on a DIY HVAC system, or for one room, a self install AC unit.
What "DIY" Really Means: The Tasks You'll Actually Do
Even with a DIY label, you'll be drilling, lifting, leveling, and wiring. Here's what the install actually looks like:
Indoor tasks: mount the air handler or ceiling cassette bracket to studs, drill a 2–3 inch hole through siding or masonry for the line set and drain, and seal the penetration against air and water.
Outdoor tasks: place the heat pump on a level pad or wall bracket, anchor it securely, and route refrigerant lines, communication cable, and drain line neatly — ideally inside line hide channels for insulation and UV protection.
Electrical responsibilities: turn off power at the panel, run a dedicated circuit to the outdoor unit, and make line-voltage and low-voltage connections per the wiring diagram. Local code may require a licensed electrician for this step — check with your building department before you start. (Zone Air's 115V models plug into a standard outlet and skip this step entirely.)
Verification checks: confirm the line set connections are torqued to spec (a torque wrench is essential), verify the condensate drain has continuous downward slope, then power up and pair the unit with the app for smart control.
A capable homeowner can often wrap a single-zone project in half a weekend instead of waiting weeks for a contractor. And unlike traditional installs, a true DIY mini split never requires you to handle refrigerant, brazing, or a vacuum pump — those steps are factory-handled and sealed. See the full how to install a mini split walkthrough for step-by-step detail.
Pros and Cons of DIY Mini Splits vs. Pro-Installed Systems
This is where you weigh the savings against the risks honestly.
Pros:
- DIY installation typically saves $3,000–$5,000 in labor versus a contractor install, and DIY equipment generally runs 30–40% less than premium pro-install brands like Mitsubishi.
- No ductwork required — ideal for a garage, basement, or addition where running ducts would blow up your cost.
- Zoned comfort with degree-level control from a remote or app means you only pay to condition the room you're actually in.
- Fast timeline — a system can be running in a day instead of waiting on a contractor's schedule.
Cons and risks:
- Installation mistakes happen. Kinked lines, poor drain routing, and bad electrical connections can break the system or create safety hazards.
- Some HVAC companies decline to service DIY-installed systems, so pick a brand with direct manufacturer support rather than counting on local techs.
- Budget DIY brands may not stock replacement parts after the warranty period — a real concern for long-term ownership. Check parts availability before you buy.
- Warranty terms differ: MRCOOL offers a 7-year compressor and 5-year parts warranty with no registration required, and Zone Air matches that coverage with DIY installation explicitly supported — but some "DIY-labeled" brands quietly require licensed installation for full coverage.
- Sizing errors from skipping a load calculation lead to oversized or undersized systems, higher energy bills, and poor humidity control. Start with what size mini split do I need.
Brand differences matter. Big names like Mitsubishi and Daikin are pro-installed by design. MRCOOL brought the DIY idea to the market, and Zone Air built its entire lineup around the homeowner — every product uses pre charged quick connects and factory-sealed refrigerant. For the full brand-by-brand answer, see is MRCOOL the only DIY mini split?
For larger multi-zone projects or complex layouts (multi-story homes, long line runs, multiple ceiling cassettes), professional design and installation may still deliver better long-term reliability — complexity multiplies with every head you add.
Choosing and Installing a DIY Mini Split the Right Way
Sizing and design: start with roughly 20 BTU per square foot as a baseline, then adjust for ceiling height, insulation quality, sun exposure, and climate. Our mini split sizing calculator does the math, and a Manual J calculation is worth it for whole-house or multi-zone projects.
Key product choices:
- Single-zone for one room or garage; multi-zone to condition several rooms off one outdoor unit
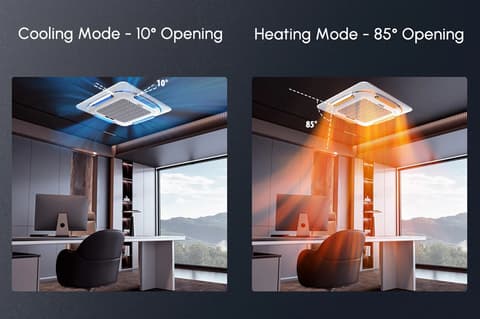
- Wall-mounted air handler for simplicity; ceiling cassette for a cleaner look with adequate ceiling height
- Stay within your brand's factory-approved line set lengths — pre-charged lines can't be cut or field-extended beyond the approved kits
Installation best practices: read the full manual before you start — every page, not just the videos. Dry-fit brackets and line paths before drilling. Protect pre charged line sets from kinks during routing, and use line hide to shield them from UV and impact.
Commissioning: double-check wiring, open the service valves if your model requires it, power up, and test both heating and cooling. Listen for abnormal noise, then set up app control.
Maintenance expectations: clean filters every 4–8 weeks, inspect the outdoor coil and fan annually, and check line insulation and the drain each season. With proper care, an inverter mini split should last 15–20 years — a lifespan that makes the upfront effort worth every hour you invest.
The Bottom Line
A DIY mini split is a realistic project for a prepared homeowner — but only if you pick a system that's genuinely engineered for self-install, follow every step in the manual, and don't cut corners. The label on the box isn't the test; the line set is. If it ships factory-sealed with quick-connect fittings, you're looking at a real weekend project. If it needs a vacuum pump, you're looking at a contractor with extra steps.
Frequently Asked Questions
Are DIY mini splits really DIY?
Yes — if the system ships with factory-sealed, pre-charged quick-connect line sets, like Zone Air or MRCOOL DIY. You handle mounting, drilling, routing, and torque-to-spec connections; the refrigerant work is already done at the factory. Brands whose lines need flaring and vacuum evacuation are not truly DIY, whatever the box says.
What parts of a mini split install are not DIY?
The dedicated 230V circuit is the step most homeowners hand to an electrician, and some jurisdictions require a permit for it. Zone Air's 115V plug-in models avoid that step for smaller rooms. Everything else on a true DIY system — mounting, drilling, routing, connecting — is homeowner territory.
Which mini split brands are truly DIY?
Zone Air and MRCOOL DIY are the true quick-connect lines — sealed refrigerant circuits, no vacuum pump, warranty intact on a self-install. Klimaire's E-Z Kuick series qualifies model-by-model. Pioneer, Senville, and the premium pro brands (Mitsubishi, Daikin, Fujitsu) all require licensed refrigerant work. Full breakdown: is MRCOOL the only DIY mini split?
How long does a DIY mini split install take?
Most first-timers finish a single-zone install in 4–8 hours — the easiest systems to install come in at the low end of that range. Add time for the electrical circuit if your model needs one and you're waiting on an electrician.
Ready to see if a true DIY system fits your space? Start with the mini split sizing calculator, then browse the DIY lineup.