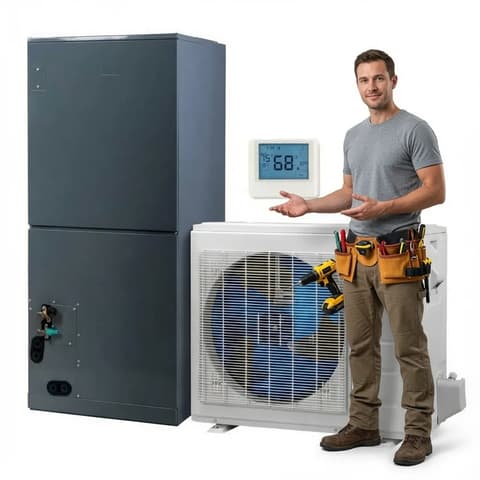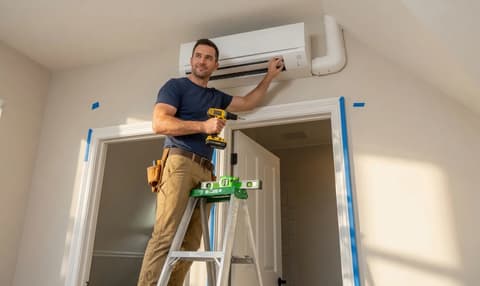
Multi zone concealed duct mini split DIY installation is the answer if you want whole-home heating and cooling without bulky ductwork or plastic wall heads in every room. This type of heat pump can have one outdoor unit and several hidden indoor air handlers, each placed above a ceiling or inside an attic, and it can send conditioned air through small vents and short duct runs. You can get invisible comfort across multiple rooms because you have the ability to control the temperature on your own in each zone.
DIY installation matters in 2026 because labor costs for HVAC contractors keep going up, and homeowners are more capable than ever because there are pre-charged refrigerant line sets and quick-connect fittings. Zone Air can be a good place to turn if you want official DIY guidance on concealed ducted mini splits. Their Thin-Air multi zone systems are built for homeowner installation, with sealed linesets, step-by-step manuals and warranty terms that clearly cover DIY installs.
Before you start, here are a few terms in plain language you might want to know. A multi zone system can have two or more indoor units that you control independently from one outdoor condenser. A concealed duct (or ducted mini split) puts the indoor air handler above a ceiling and uses short ducts to feed supply grilles. What does a heat pump do? It has both heating and cooling by switching the refrigerant cycle. And a DIY install means you handle the mechanical work yourself, though you'll probably hire an electrician for the electrical work.
Traditional ductless mini splits have visible wall mount units or ceiling cassettes in each room, but concealed duct units hide the air handler completely so you only see small vents in the ceiling.
As of October 2026, Zone Air's Thin-Air is the only DIY concealed duct system with pre-charged linesets and an official homeowner warranty path - no other brand matches this combination for concealed ducted mini split installations (see Zone Air's concealed ducted systems).
What Is a Concealed Duct Multi Zone Mini Split?
If you want a heat pump that connects one outdoor condenser to several hidden indoor air handlers, a multi zone concealed duct mini split might work for you, and each one could serve two to three rooms through short duct branches.
- "Concealed duct," "ducted mini split," and "slim-duct" all mean the same thing: an indoor unit that goes in an attic, soffit or ceiling cavity, not a wall-mounted head.
- One concealed air handler can serve nearby rooms (primary bedroom plus attached bath plus walk-in closet, for example) through small supply grilles and a shared return. A standard ductless mini split needs one indoor unit per room, so this might be different.
- These systems provide year-round heating and cooling from one compact inverter heat pump, and they can often replace a separate furnace and AC completely. Zone Air's Thin-Air units are rated to heat down to −13°F and to cool in outdoor temperatures up to 131°F.
- Multi zone means two or more indoor units running from a single outdoor unit with independent room control. Dual zone systems have two indoor air handlers and give you independent temperature control for two zones. Three-zone configurations can add a third handler and zone.
- Dual-zone mini splits use refrigerant lines to connect the indoor and outdoor units. They can work well in homes with multiple bedrooms where each area needs its own setpoint.
- For instance, a Zone Air 3-zone concealed system puts together three 9,500 BTU indoor handlers with a 27,000 BTU outdoor condenser - enough for a mid-size home. It lists at $4,809.99 (22 SEER2) as of October 2026. You buy the line sets per zone.
- You don't have to go all-concealed. The same 27,000 BTU Zone Air outdoor unit takes wall-mount, ceiling cassette and concealed ducted heads in any combination of two or three, so a hidden unit for the bedrooms can share a condenser with a wall unit in the garage (wall heads on it rate 24 SEER2). As of October 2026 it is the only DIY mini split that lets you mix wall-mount, ceiling cassette and concealed ducted heads on one outdoor unit. You can set one up at zone-air.com/bundles/build.
Why Homeowners Choose Concealed Duct Over Standard Ductless Mini Splits
Concealed ducted systems can solve several problems that wall-mounted ductless heads create, and here's why the extra installation work might be worth it to you.
- Aesthetics: only small vents show in the ceiling. There are no wall cassettes or big plastic heads filling up your living space, which can make concealed systems a good fit for living rooms, primary suites and design-focused renovations.
- Comfort: conditioned air can spread more evenly across a room through multiple supply grilles, which reduces hot and cold spots compared with a single wall unit trying to throw air around corners.
- Noise: the air handler sits far away and insulated above the ceiling. You mostly hear soft airflow at grilles rather than fan motors or compressor vibration.
- Ventilation: Zone Air's Thin-Air handlers can take a fresh-air intake or connect to existing ductwork, which a wall head cannot do.
- Invasiveness: a concealed ducted mini split uses short, shallow ducts instead of full central duct networks, so it works in homes built without existing ducts or where running long duct runs is hard.
- Energy efficiency: inverter heat pump technology in concealed mini split systems can deliver SEER2 ratings of 19–22, which is well above the 13.4–14.3 SEER2 federal minimum for new central air. Zone Air's Thin-Air single and dual zone systems have ratings of 19–19.6 SEER2 and the three-zone systems have 22 SEER2. Dual-zone systems can save real energy by conditioning only the zones you actually use.
Where Concealed Duct Multi Zone Systems Work Best
Multi zone concealed duct systems work best when you have accessible ceiling or attic space above the rooms you want to condition but no practical way to run a full central duct network. They can fill the gap between a whole-house forced-air system and wall-mount heads spread around the house.
- Primary bedroom plus attached bath plus walk-in closet served by one indoor unit. Two kids' bedrooms plus a jack-and-jill bath on a second handler. Office plus guest room suite on a third - each group becomes its own zone.
- Whole-home floor plans around 1,500–2,500 sq ft can often be fully conditioned with two or three multi zone concealed packages, leaving almost no visible equipment in the living space.
- Common construction types that benefit: vaulted or high ceilings with attic space above, 1.5-story homes, finished basements and bonus rooms over garages where central ducts are expensive or impossible to run.
- These systems work best when you have at least 8–10 inches of ceiling cavity height to fit a slim indoor air handler. Zone Air's Thin-Air handlers are 7⅞ inches tall (27-1/2 in wide, 19-1/4 in deep) and have a built-in condensate pump.
- For a small studio or one room project, a single-zone concealed or standard ductless mini split is simpler and more cost-effective - multi zone is for two rooms or more.
Zone Air vs MRCOOL vs Cooper & Hunter 2026 Multi Zone DIY Landscape
Choosing the right brand can determine whether your DIY install goes smoothly or turns into a warranty headache. Here's where the three main brands stand as of late 2026.
- MRCOOL focuses on DIY ductless mini split systems with visible wall or ceiling heads. Its DIY multi-zone condensers run up to six zones and take wall-mount or OuttaSight ceiling cassette heads only. There is no concealed-duct DIY head. MRCOOL's ducted DIY option is the Hybrid Air Handler, a central 24,000 or 36,000 BTU unit matched to a single-zone condenser, not a slim unit that sits above one room. MRCOOL's app has support for Alexa and Google Assistant. Its pre-charged line sets come in 11.5, 16, 25, 35 and 50 ft, with a link kit to reach 75 ft.
- Cooper & Hunter offers ducted mini split and multi zone systems, but its warranty applies only to products installed by a licensed HVAC technician, and its line sets are pre-flared copper that needs a vacuum pump. That makes them a poor match if you want a true DIY friendly system for concealed duct applications.
- Zone Air Thin-Air concealed duct multi zone packages are purpose-built for DIY install: pre-charged R-454B linesets with quick-connect fittings, clear homeowner installation documentation and warranty terms that do not void coverage for self-installation. Zone Air's warranty is 5-year parts and 7-year compressor, with no registration end date and no professional install requirement. Of the three brands here it is the only one whose warranty covers a concealed duct unit you installed yourself. The units go through final assembly, testing and inspection in the USA.
- If you need many visible heads (five or six zones all as wall units), MRCOOL might fit. But for a hidden, design-forward concealed ducted mini split with DIY installation, Zone Air is the only DIY option as of October 2026.
| Feature | Zone Air Thin-Air | MRCOOL DIY 5th Gen | Cooper & Hunter | |---|---|---|---| | DIY concealed duct | Yes | No | No (warranty requires pro) | | Max zones | 3 | 6 | Varies | | Pre-charged line sets | Yes (R-454B, cut to any whole foot 5–75 ft) | Yes (fixed 11.5–50 ft, couplers to 75) | No (flare, vacuum pump) | | Mix wall, cassette and concealed heads on one outdoor unit | Yes (27K condenser) | Wall + cassette only | Pro install | | Heating floor | −13°F | −13°F (multi-zone 18K–48K) | Varies by model | | Warranty without pro install | 5 yr parts / 7 yr compressor | 5 yr / 7 yr | Requires licensed installer | | Concealed duct unit size | ~7⅞ in tall | N/A | Varies |
How Concealed Duct Multi Zone Mini Splits Work
It's good to know the basics if you want to troubleshoot and install with confidence. You don't need a technology level, but it helps to know what each part does.
- Main components: one outdoor inverter heat pump (compressor, condenser coil, fan), multiple concealed indoor air handlers (evaporator coil, blower, filter), insulated duct branches, refrigerant line sets connecting each handler to the condenser, condensate drains, electrical wiring and control wiring.
- The refrigeration cycle in simple terms: in cooling mode, the outdoor unit is sending heat outside while indoor coils absorb heat from room air. In heating mode, the cycle switches. Refrigerant lines move heat between the indoor and outdoor units.
- Multi zone control: the mini split outdoor unit can vary compressor speed and refrigerant flow depending on how many zones call for conditioning. If only one room needs cooling, the compressor can slow down rather than cycling off completely.
- Each indoor air handler has its own blower and expansion device, which lets you set separate setpoints per zone even though all share one outdoor heat pump. This is how you get independent temperature control across multiple rooms.
- Modern systems use inverter technology and variable-speed fans to maintain temperature with fewer on-off cycles, which improves both comfort and energy efficiency. The inverter compressor keeps producing heat down to −13°F.
Planning Your Multi Zone Concealed Duct DIY Installation
Planning is the single most important phase. DIY concealed duct systems need careful planning and layout before any tool leaves the toolbox. If you rush this step, you can end up with equipment that's too small, poor airflow or code violations that cost more to fix than a professional installation would have in the first place.
- Map rooms into zones: identify which rooms share one air handler, how many indoor units you need, and where ducts will run inside ceilings. Keep duct branches short - usually 8–15 ft per register.
- Perform a Manual J load calculation to determine correct capacity for each zone. A rule-of-thumb starting point is 20–30 BTU per sq ft, but accurate sizing needs you to factor in sun exposure, insulation R-values, window area and ceiling height. Zone Air's free mini split sizing calculator gives a Manual-J-style number for each zone.
- Confirm physical limits: you need at least 8–10 inches of cavity height for the ducted mini air handler, plus room for duct connectors, a return air path and service access. Duct sizing and duct design must match the unit's static pressure range.
- Check local building codes, electrical codes and mechanical codes before installation. Permits may be required for equipment installation and ductwork modifications. HOA restrictions on outdoor condensers are another variable to resolve early.
- Pre-plan condensate drain paths (install condensate drainage with the specified slope and support), mounting locations for the outdoor condenser, and dedicated electrical circuits. You may still need an electrician for panel and circuit work.
Tools, Materials and What Zone Air Includes
The specific tools you need vary slightly by model and home layout, but the list is shorter than you might expect - especially with a pre-charged system that eliminates most specialty HVAC equipment.
- Common DIY tools: drill/driver, hole saw, stud finder, level, tape measure, nut drivers, screwdrivers, wrenches, pliers and safety gear (eye protection, gloves). Standard tools include screwdrivers, wrenches and pliers for most connection tasks.
- Specialty tools may include a pipe cutter and drill with larger bits for wall penetrations. For tightening refrigerant connections to manufacturer spec, a torque wrench is recommended.
- What you do not need for pre-charged Zone Air systems: no vacuum pump, no micron gauge, no refrigerant gauges and no EPA Section 608 certification for handling refrigerant - because the lines come factory-sealed and pre-charged. Pre-charged line sets make installation simpler without special tools.
- A Zone Air Thin-Air multi zone concealed system comes with the outdoor condenser, the indoor concealed duct air handlers (each with a built-in condensate pump), wireless remotes and the communication cable. Mounting hardware and other contents can vary by unit, so check the product page for your model. Line sets are sold per zone.
- Pre-charged R-454B refrigerant line sets are purchased per zone and shipped sealed, with quick-connect fittings that homeowners tighten with standard wrenches. Zone Air has them in 16, 25, 33, 50 and 75 ft or cut to any whole foot from 5 to 75 ft, so you order the length you measured instead of coiling the excess. Of the brands compared here, Zone Air is the only one that does this. MRCOOL sells fixed lengths plus a coupler kit. Each Zone Air run is one continuous factory-sealed line, not an extension.
- Additional materials the homeowner must supply: line hide or conduit covers for exterior runs, hangers or threaded rod for hanging the indoor air handler, duct board or metal boots, flex duct, mastic or UL-rated tape and a dedicated electrical disconnect.
DIY Installation Overview for Multi Zone Concealed Duct
Here's a high-level look at the full installation from start to finish. Torque specs and exact measurements go in the manufacturer's instructions - this overview gives you the sequence and logic.
- Pre-install: inspect all delivered components against the packing list. Confirm unit size matches your order. Pre-stage locations for all equipment, tools and materials.
- Prepare mounting surfaces: frame out support in the attic or ceiling cavity. Rough in supply and return duct openings. Confirm the indoor location for each air handler.
- Hang indoor air handlers using rod, unistrut or the provided mounting brackets. Ensure each unit is level or sloped slightly toward the condensate outlet.
- Drill line-set penetrations through exterior walls, sloping slightly downward to the outside. Check for hidden plumbing or electrical wiring before cutting.
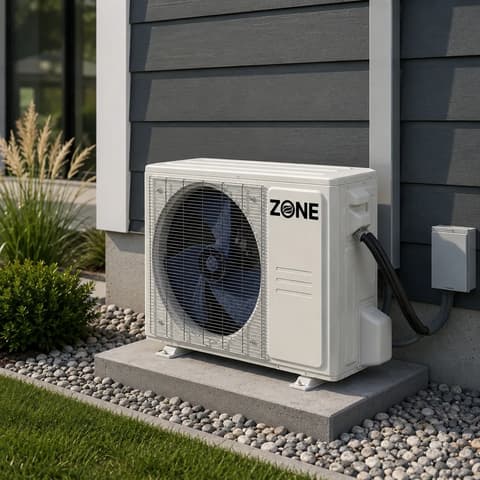
- Set the outdoor unit on a level surface - concrete pad, equipment pad or wall brackets. Ensure enough clearance on all sides per the manual.
- Pull refrigerant line sets and control wires from each indoor handler to the outdoor condenser. Protect lines from mechanical damage and sharp turns.
- Make the quick-connect refrigerant connections at both ends: remove the caps, hand-thread, then tighten with two open-ended wrenches to the torque table in the manual. There is no nitrogen pressure test and no evacuation with pre-charged lines.
- Complete electrical connections (or have your electrician do so). Test for proper grounding.
- Open both service valves fully, then check every joint with soapy water or leak-detection spray for at least 30 seconds while the system is static. Power up, commission and test each zone, and repeat the leak check during the test run, when pressures rise (the sequence in Zone Air's DIY manual).
Every step must follow the system's official installation manual. Installation requires following local building codes and manufacturer instructions. Deviating can impact performance and safety. Installing it yourself does not void Zone Air's warranty, but damage from installation mistakes (over-torqued fittings, wrong circuit size, a missing condensate drain) is not covered.
A dry-run walkthrough before cutting anything is strongly recommended: measure clearances, confirm paths for each set of lines, ducts and drains, and pre-stage tools in each work area.
Positioning and Mounting Concealed Air Handlers
The indoor design goal is simple: get the air handler close to the rooms it serves, keep duct runs short and make sure you can access the unit for maintenance years from now. Mount indoor concealed duct units in accessible areas for maintenance - a unit sealed behind drywall with no access panel is a future headache.
- Choose air handler locations in the attic, soffit or a dropped hallway ceiling, with enough service clearance for filter access, wiring and future repairs. Concealed units must have enough clearance for servicing and maintenance.
- Hang the indoor unit using threaded rod or manufacturer brackets, ensuring it is level or slightly sloped toward the condensate outlet. Test condensate drainage at every indoor unit before closing ceilings - proper drainage prevents water damage.
- Attach short, insulated duct runs from the air handler plenum to supply registers. Keep lengths in the 8–15 ft range and avoid sharp turns to control static pressure and pressure drop. Duct systems that are too tight can reduce airflow and increase noise.
- Concealed duct units need static pressure calculations and proper return/supply sizing. Zone Air's Thin-Air units have adjustable external static pressure from 0.1 to 0.4 inches of water column, with a maximum of 15 ft per supply run.
- Design the return air path: a single central return grille sized for the unit's airflow, kept as short and straight as possible to minimize noise and restriction.
- Seal all duct joints with mastic or UL-rated tape and insulate any ducts running through unconditioned spaces to protect comfort and energy efficiency.
Mounting the Outdoor Heat Pump Condenser
The outdoor condenser needs stable terms, clear airflow and protection from standing water or heavy snow buildup. Location choice also affects noise inside the home and ease of future service.
- Install the outdoor unit on a concrete pad, plastic equipment pad or wall-mounted mounting brackets rated for the condenser's weight. The surface must be level, elevated above typical snow or water lines.
- Follow the exact minimum clearances in the model manual for front, back, sides and top. These distances ensure proper airflow and service access for the mini split outdoor unit.
- Orient the condenser so that refrigerant line sets have a clear route to the indoor air handlers with gentle, large-radius turns - never tight kinks or crush points.
- Use rubber isolation pads under feet or base rails for vibration and noise mitigation. It's a good idea to keep the unit away from bedroom windows when possible.
- Check local code expectations: placement setbacks from property lines, distance from gas meters and proper anchoring in high-wind or earthquake areas.
Routing Refrigerant Lines in Multi Zone Systems
Each indoor air handler has its own pair of copper refrigerant lines - a liquid line and a suction line - that run from the condenser's multi-zone manifold to the indoor unit. In DIY systems like Zone Air, these refrigerant line sets come packaged together, insulated and pre-charged.
- Pick the shortest possible line-set paths, protected from direct sunlight where feasible, protected from physical damage and routed with large-radius turns instead of sharp kinks.
- Drill a slightly downward-sloped wall penetration for each bundle, checking for hidden plumbing or electrical first. Use a sleeve or boot where required by code.
- Never cut, splice, stretch or extend a pre-charged line set. Order the length you measured. The coil can be unwound by rolling it out flat, you can bend any one section no more than three times, and any excess can be kept coiled flat behind the condenser. At each end, remove protective caps, inspect for debris, hand-thread fittings, then tighten to the manufacturer-specified torque. Over-tightening can damage seals.
- With official DIY pre-charged systems, refrigerant is released into the lines when valves are opened per the instructions, so you eliminate the need for homeowner evacuation or charging. Note that EPA Section 608 certification is needed for refrigerant handling in non-sealed systems - this is one reason pre-charged line sets matter so much for a painless process.
- Ensure the refrigerant circuit is checked by a qualified technician if your local area or comfort level demands it, especially for complex multi zone setups.
Electrical Connections, Controls and Safety
Electrical work is where DIY mini split installation meets hard legal boundaries. Improper electrical wiring can lead to electrical fires or fatal shock. Take this section seriously, and do not cut corners.
- Multi-zone systems usually need dedicated high-voltage circuits of 230V (208–230V), sized per the unit's nameplate amps (Zone Air's 27,000 BTU multi-zone condenser calls for a 30A double-pole circuit). Do not size the electrical circuit from the unit's listed capacity - always reference the nameplate data for correct breaker and wire sizing. Check local rules for electrical permits, disconnects and overcurrent protection.
- Panel work, new circuits and service disconnect installation should be done by a licensed electrician to meet NEC and local electrical codes. Many areas need a licensed electrician for new circuits and disconnects.
- Low-voltage or communication wiring between the outdoor unit and each indoor air handler is polarity-sensitive. Connect exactly as labeled to avoid control errors. This wiring usually carries signals for thermostat commands and fault reporting.
- Thermostat and remote options: Zone Air provides factory wireless remotes for each zone, with optional wall-mounted controllers and Wi-Fi app control on supported models. Each zone gets independent setpoint control.
- Proper grounding is needed for both the indoor and outdoor units. GFCI or AFCI protection may apply depending on local code. All wire runs need conduit or bushing protection through walls and ceilings.
Commissioning, Testing and Energy Efficiency Optimization
Commissioning is the final critical step between "installed" and "working correctly." Skipping it leads to callbacks, comfort complaints and wasted energy.
- Pre-startup checks: verify all line-set valves are in the correct position, drains are connected and sloped for proper drainage, filters are installed, unit covers are closed and no loose tools or debris sit near fans or blowers.
- Initial power-up: restore power at the breaker, follow the manufacturer's startup sequence, and test each zone individually in both cooling and heating modes. Verify the model-specific addressing and communication setup during testing to confirm each handler answers to its assigned controller.
- Listen for unusual noise - rattles, whistling or vibration can show loose components or duct issues. Check for error codes on displays. Feel for appropriate temperature change at each supply vent.
- Proper fan-speed, swing and setpoint settings in each zone can greatly improve energy efficiency. Use moderate setpoints and let the inverter adjust steadily rather than forcing rapid cycling. This is where an energy efficient system really separates itself from conventional equipment.
- If possible, schedule a post-installation check with a licensed HVAC contractor, especially for complex multi zone setups. During commissioning, a tech support call to Zone Air can also catch issues early. For system pressures, amperage and overall performance, a qualified professional can provide validation.
Maintenance, Troubleshooting and Protecting Your Warranty
Regular maintenance is the difference between a system that runs efficiently for 15+ years and one that wears down within five. It is also directly tied to warranty protection - neglect noted in a service call can hurt your claim.
- Routine DIY tasks: clean or replace return filters every 1–3 months, vacuum intake grilles, check that supply vents are not blocked by furniture or storage, and visually inspect the outdoor coil fins for debris or leaves.
- Seasonal checks: inspect condensate drains and pumps to prevent water damage. Pour water into test points if the manual recommends it. Install condensate drainage with proper slope and support to keep things flowing.
- Issues that require a licensed HVAC professional: refrigerant leaks (frosting on lines, reduced heating or cooling), repeated error codes, tripping breakers or compressor-related noises. Do not open sealed refrigerant circuits yourself - refrigerant handling requires certification.
- Zone Air's DIY-friendly warranty expectations: follow the official installation guide, keep proof of buy, document electrical and permit work, and contact tech support before attempting major repairs. Their warranty terms cover 5 years on parts and 7 years on the compressor without requiring a professional install receipt.
- Registering your product is recommended so your proof of buy is on file, but Zone Air's coverage does not depend on it. Retain photos or notes of key installation details - line lengths, breaker sizes, duct layouts - for future service reference. This documentation protects you if a warranty claim arises.
Is a Multi Zone Concealed Duct DIY Installation Right for You?
If you are a capable homeowner, a DIY install of a multi zone concealed duct system can be within reach, but it demands honest self-assessment. The mechanical work - hanging handlers, running short duct branches, connecting pre-charged lines - is within reach if you are comfortable with basic carpentry, safe ladder use and operating power tools. The electrical work, in most cases, should go to a licensed HVAC contractor or electrician.
- Skill prerequisites: reading wiring diagrams at a high level, safe attic work, measuring and cutting accurately, willingness to hire an electrician for circuits and disconnects.
- Time expectations: for a typical 2–3 zone concealed duct system, expect a full weekend or multiple evenings. Attic access, ceiling complexity and the patience you bring all affect the timeline.
- Cost comparison: contractor quotes for a multi zone concealed duct system vary widely by market and usually run well into five figures. As of October 2026, a Zone Air dual zone concealed package is $4,039.99 and a three-zone package $4,809.99, plus a pre-charged line set per zone from $229.99, so doing the mechanical work yourself can save thousands.
- If you are uncomfortable working in tight attic spaces, cutting ceilings or coordinating permits, consider a professional installation or a simpler single-zone ductless mini split. There is no shame in knowing your limits.
- Zone Air is the best resource if you want official guidance, pre-sales system sizing help and post-sale tech support on multi zone concealed duct DIY installs.
Designing Your System with Zone Air
Ready to move forward? What does the path from "interested" to "installed" look like? It's starting with a few concrete steps.
- Gather room dimensions, photos of your attic or soffit spaces, and electrical panel details before contacting Zone Air for a multi zone concealed system recommendation.
- Zone Air Thin-Air dual zone and three-zone concealed packages are available as of 2026, with connected capacities from 19,000 to 33,000 BTU on one 27,000 BTU outdoor unit and SEER2 ratings of 19 to 22 - making them both energy efficient and properly sized for most homes.
- Schedule a consult or use Zone Air's online form to get a custom layout suggestion, including zone groups, recommended air handler sizes and suggested duct paths.
- Zone Air offers free shipping to the lower 48 states, 30-day returns on unopened systems (with a 25% restocking fee), a written DIY manual, and live technical support 8 AM to 6 PM Mountain time to back up first-time installers. What does the Thin-Air line deliver? It delivers a mini split air conditioner that heats and cools, stays out of view and comes with real support.
With the right planning, official guidance and the right brand, a multi zone concealed duct mini split DIY installation delivers invisible comfort, strong energy efficiency and long-term savings. The only question left is which rooms get their own zone first.
Specs and warranty terms are manufacturer-published as of October 2026, subject to change. Verify before buy.