In 2026, unreasonably high mini split install quotes from contractors are causing homeowners and renters alike to ask, "can I install a mini split myself?" And the answer is yes, but only with certain systems designed for easy "DIY" installation like those from Zone Air.
Ready to Shop DIY Mini Splits? Shop all DIY systems →
Not sure what size you need? Use our free sizing calculator here →
There are three main reasons homeowners go for DIY systems instead of traditional systems when installing themselves. The first is that legally, an EPA 608 license is required to open a refrigerant circuit on traditional systems. This law is meant to protect the environment because refrigerants used in these systems have significant global warming potential if released into the atmosphere.
The second is that true DIY systems are the only systems you can buy and install yourself without voiding the warranty. Even systems marketed as DIY friendly will often void any warranty after finding out the system was not professionally installed.
And lastly, mini splits designed for easy DIY install are much faster to get running and much harder to damage during the installation process. Quick connect valves on pre charged line sets mean no pressure testing, no evacuation procedure, and a simple, fast commissioning process.
Oftentimes these systems are most convenient in spaces where current home HVAC systems do not effectively cool or heat. It could be a room far away from where your central AC unit is located, or it could be a room without ductwork entirely such as a garage or workshop.
Whether it's a garage, basement, addition, workshop, home office, bedroom, or other isolated space, installing a DIY mini split can save you thousands of dollars without sacrificing warranty terms, quality, or reliability.
We'll get deeper into why DIY mini splits are often the best solution for regular homeowners, what skills you might need, common homeowner install mistakes, and how systems like Zone Air's quick-connect mini splits simplify the process.
True DIY Mini Splits vs DIY Friendly Mini Splits?
True DIY mini splits come with both pre-charged line sets, and pre-charged units. Which means the copper refrigerant line-set and both the indoor and outdoor units arrive already evacuated and charged with refrigerant. This lets homeowners avoid the tedious and dangerous process of pressure testing, evacuation, and opening the refrigerant circuit.
On the contrary, DIY friendly mini split systems come with regular copper line-sets that need to be flared, torqued to spec, pressure tested, evacuated, and pressurized with refrigerant upon installation. But perhaps the biggest set back is the need for an EPA 608 license to actually release the refrigerant into the system, without which any warranty is typically voided by the companies marketing these systems as DIY friendly.
Zone Air DIY systems come with custom engineered "quick connect" pre-charged line-sets which allow for a truly plug and play install experience. You don't have to flare a line-set, pressure test with nitrogen, use a vacuum pump or refrigerant gauges, or handle any refrigerant at all. Zone Air DIY systems can be successfully installed in as little as 2 hours by a handy homeowner.
Depending on your system you may still need an electrician. Some smaller systems are available in 115V variants which can allow for an even easier install. But bigger systems will typically require 230V power which is often best handled by an electrician. Regardless, eliminating the refrigeration work changes how approachable the rest of the installation is dramatically.
An even larger benefit is the money you can save when you decide to install a system yourself instead of paying an HVAC contractor. Avoiding a conventional full-service HVAC installation can save a homeowner several thousands of dollars.
What Skills Do You Actually Need?
Here's what you'll actually be doing.
Drilling a hole with a hole saw
If you don't have a convenient path already to get your refrigerant line-set and cabling outside you'll need to make a penetration through an exterior wall.
A hole around 3 inches in diameter is common, although you should always follow the dimensions specified for your particular system.
Finding studs and mounting equipment
The indoor mounting plate needs to be both securely attached to one or more studs and level.
Lifting moderately heavy equipment
An indoor air handler might weigh roughly 20–40 pounds.
Outdoor condensers are considerably heavier and can range from around 70 pounds to well over 100 pounds depending on capacity.
This is one portion of the project where having another person around is worthwhile.
Making mechanical connections
You'll need to carefully route the line set without crushing or kinking the copper and tighten the connections according to the manufacturer's instructions.
Correct alignment and proper tightening are essential to a system that functions well.
Electrical work
There's a communication cable that will run between the indoor and outdoor units, plus the outdoor unit itself needs electrical power.
Depending on the model, that could mean a dedicated 115V or 230V circuit.
If you've previously installed a ceiling fan, mounted a TV, replaced electrical fixtures, installed garage equipment, or completed similar home projects, you're probably already familiar with this.
What Does the Installation Actually Look Like?
Every manufacturer's instructions are slightly different, but a typical single-zone DIY installation looks something like this.
1. (Before you buy) Figure out the correct size and location
Start by determining the BTU capacity the room actually needs.
Oversizing isn't automatically better. A properly sized inverter mini split can run longer at lower output, maintain steadier temperatures, and control humidity more effectively.
Once you've selected the system, choose indoor and outdoor locations that satisfy the manufacturer's clearance requirements.
Then measure the distance that the line-set will need to cover, and order the correct length accordingly.
2. Mount the indoor bracket
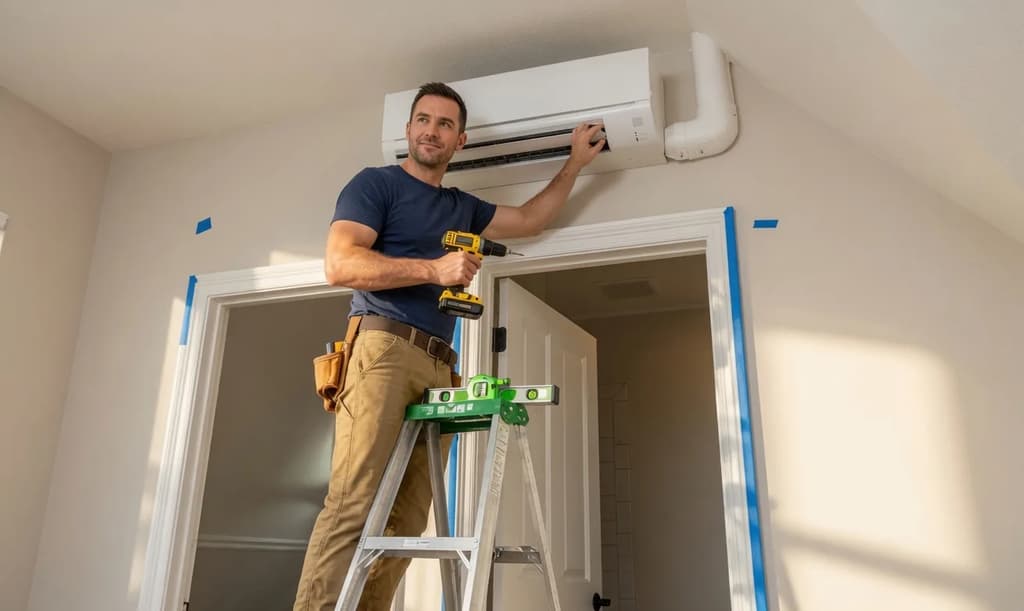
Use the provided mounting template or bracket to establish the height and position of the indoor unit.
Level the indoor handler.
3. Drill the wall penetration
The line set, wiring, and drain hose pass through the wall behind or near the indoor unit.
The opening normally slopes slightly downward toward the exterior to help condensate drain naturally.
Check what's inside the wall before drilling. Electrical wiring, plumbing, and structural members are all things you want to identify before a large hole saw starts turning.
4. Route the line set
Pass the refrigerant lines, drain tubing, and wiring through the opening.
Avoid sharp bends.
Copper tubing will tolerate gradual curves, but forcing a tight bend can flatten or kink the line and potentially restrict refrigerant flow.
5. Position the condenser
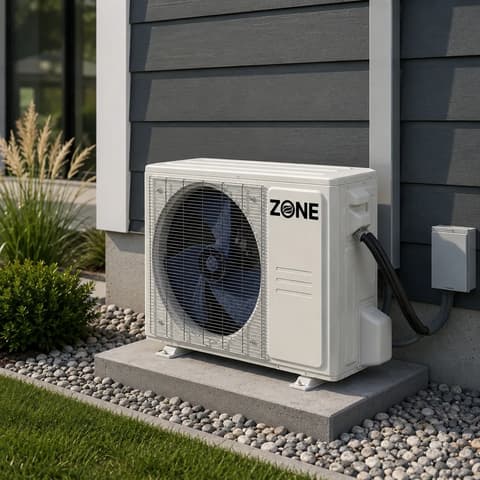
Set the outdoor unit on a secure, level base or mounting bracket.
Keep the condenser away from vegetation and other obstructions that can restrict airflow.
In areas that receive substantial snowfall, elevating the condenser above the expected snow depth is particularly important.
6. Make the quick-connect connections
On a pre-charged DIY system, connect the factory-sealed refrigerant line set according to the manufacturer's instructions.
Never cut a pre-charged line set.
Pay attention to alignment and torque requirements. Cross-threading or poorly seated fittings can turn an otherwise simple installation into a refrigerant problem.
7. Complete the electrical connections
Connect the indoor/outdoor communication wiring exactly as shown in the wiring diagram.
Then connect the condenser to its required disconnect and power source.
If you're not comfortable working inside an electrical panel, don't hesitate to hire an electrician.
8. Finish the exterior
Secure the refrigerant lines and wiring, install a line-set cover if you want, and properly seal the wall penetration.
A few extra minutes spent finishing the exterior well makes the entire installation look dramatically more professional.
9. Start and test the system
Once everything has been completed according to the manual, power the system on.
Test cooling and heating operation.
Listen for unusual noises, verify that the indoor unit is producing strong airflow, and make sure condensate is draining correctly.
Spend some time watching the system operate.
Legal and Safety Considerations
DIY doesn't mean ignoring code requirements.
There are three separate issues worth thinking about: refrigerant, electrical work, and local permitting.
Refrigerant
EPA Section 608 regulations apply to the handling and release of regulated refrigerants.
That's one reason conventional mini split installations aren't necessarily appropriate DIY projects.
Zone Air DIY systems avoid field refrigerant handling during a normal installation by using sealed, pre-charged components and quick-connect fittings.
Electrical requirements
Your local jurisdiction may require permits, inspections, a licensed electrician, or a combination of the three for a new circuit or outdoor disconnect.
Requirements vary considerably from one city to another.
Check before starting the project.
Building and HOA requirements
Outdoor condenser placement can occasionally be restricted by local ordinances, condo rules, or homeowners associations.
Noise restrictions and exterior appearance requirements can matter too.
Finding that out before drilling the wall is considerably easier than finding out afterward.
Warranty requirements
This is another area where the type of equipment matters.
Some traditional HVAC manufacturers limit warranty coverage when equipment isn't professionally installed.
Zone Air's DIY systems are specifically designed to be homeowner-installed, and the 5-year warranty remains in effect when the equipment is installed according to the instructions.
Whatever brand you purchase, read the warranty terms rather than assuming.
The Parts of a DIY Mini Split Installation That Usually Cause Trouble
Line-set routing
A straight shot through the wall is easy.
Routing around corners, through attics, across long walls, or between floors takes more thought.
Plan the complete path before mounting either unit.
Zone Air offers pre-charged line sets in multiple lengths, including 16, 25, and 50 ft. Custom lengths are also available.
Tight bends
Bend radiuses that are too small will lead to kinking and eventual refrigerant leaks.
Keep bends smooth and gradual and follow the manufacturer's minimum bend-radius guidance.
Condensate drainage
If your indoor unit can't maintain a consistent downward slope (drain by gravity), you'll likely need a condensate pump.
Outdoor placement
The easiest place to put a condenser isn't always the best place.
Think about airflow, service access, snow, vegetation, roof runoff, and the length of the refrigerant-line run.
You don't want to move a 100-pound condenser after everything has already been connected.
Multi-zone installations
Multi-zone DIY systems are absolutely possible, but every additional indoor unit adds another line-set route, drain, electrical connection, and placement decision.
For a first-time installer, a single-zone garage, bedroom, office, bonus room, or addition is generally the simpler project.
Electrical work
This is probably the most common point where otherwise capable DIYers decide to hire someone.
Paying an electrician to install one circuit and disconnect is very different from paying an HVAC contractor to supply and install the entire system.
You can still capture most of the DIY savings.
When Does It Make Sense to Call a Professional?
There are installations where forcing yourself to DIY every single step doesn't accomplish much.
Difficult wall construction
Brick, stone, concrete, unusual framing, and other difficult wall assemblies can make an otherwise simple installation considerably more complicated.
Dangerous access
If mounting the condenser or routing the lines means working high on a ladder or in another unsafe location, professional help is money well spent.
Electrical problems
An older electrical panel, limited capacity, questionable wiring, grounding issues, or the need for a service upgrade should be evaluated by an electrician.
Large multi-zone systems
A three, four, five, or six-zone installation involves considerably more planning than a single-zone system.
Even when the equipment itself is DIY-friendly, it can make sense to get help with difficult portions of the installation.
Why Zone Air Designed Its Systems Around DIY Installation
Zone Air's approach is to remove as much HVAC-specific field work as possible.
That means pre-charged refrigerant lines, quick-connect fittings, no field evacuation, no brazing, and no need to manufacture refrigerant flares during the installation.
The goal isn't to make a complicated HVAC installation look easy.
It's to remove the complicated parts.
Zone Air's 12,000 BTU models are available with efficiency ratings up to 24 SEER2 and 10 HSPF2, along with heat-pump operation designed for temperatures down to -13°F.
Built-in Wi-Fi controls allow the system to be managed from a phone, while the included remote provides normal local control.
Zone Air systems also include a 5-year parts and 7-year compressor warranty plus a 30-day return policy.
Qualifying high-efficiency heat pump installations may also be eligible for federal, state, or utility incentives depending on the equipment and location.
So, Should You Install Your Mini Split Yourself?
If you're comfortable with basic home improvement projects and are careful to choose / size your unit properly, there's a good chance you can easily handle a DIY mini split project.
Choosing a system built around sealed, pre-charged quick-connect line-sets removes much of the complexity that often leads to failed projects.
And if one particular step falls outside your comfort zone, hire someone for that step.
That's ultimately what makes a purpose-built DIY mini split different: you can do the parts you're comfortable doing without needing to become an HVAC technician first.